I've been obsessed with rose earrings for a really LONG time. I remember searching for the perfect pair several years ago, and was met with disappointment. Recently, they've become much more common, and I fulfilled my dream of finding the perfect pair at a Vintage craft fair at Christmas.
The girl at the booth MADE them, and I though....hey, why can't I do that? So I did!
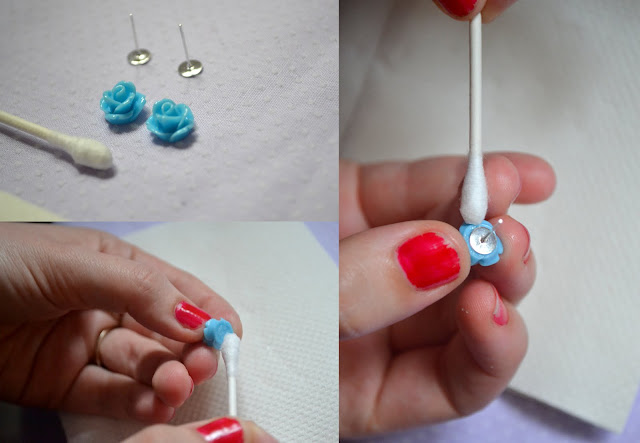
I ordered the roses off of etsy (just search: rose cabachons, and there ya go!), and picked up the earring posts at Michaels. You'll also need some glue....I'm using E6000. (I tried hot glue, which worked, but if you pull too hard on your rose it might come off!)
{Note: Michaels also sells similar roses in case you don't want to order something online. They're slightly larger, but worked nicely as well!}
Supplies:
-rose cabachons
-earring posts
-glue
-Q-tips
First dab a bit of glue onto one of your roses using (you may want to use a Q-tip or toothpick to help spread it around), and then press an earring post firmly onto the back of the rose. You should apply enough glue that little bit squeezes out when you apply the earring post. Then, use a Q-tip to clean up any excess glue.
(Thanks goes to my roomie for humoring me and helping out by putting together this pair so I could photograph the process!!)
Now comes the most important part. Do NOT touch them for 24 hours!!! This is vital, as it let's the glue set properly. The nice thing with E6000 is that it doesn't harden instantly, giving you time to readjust the placement if you need to AND you don't have to worry about gluing your fingers to together!
And here are the ones I made using the roses from Michaels!
Now I have one for every day of the week, and they will make lovely presents!
ps: kelsey ♥


0 comments:
Post a Comment