Showing posts with label mocha. Show all posts

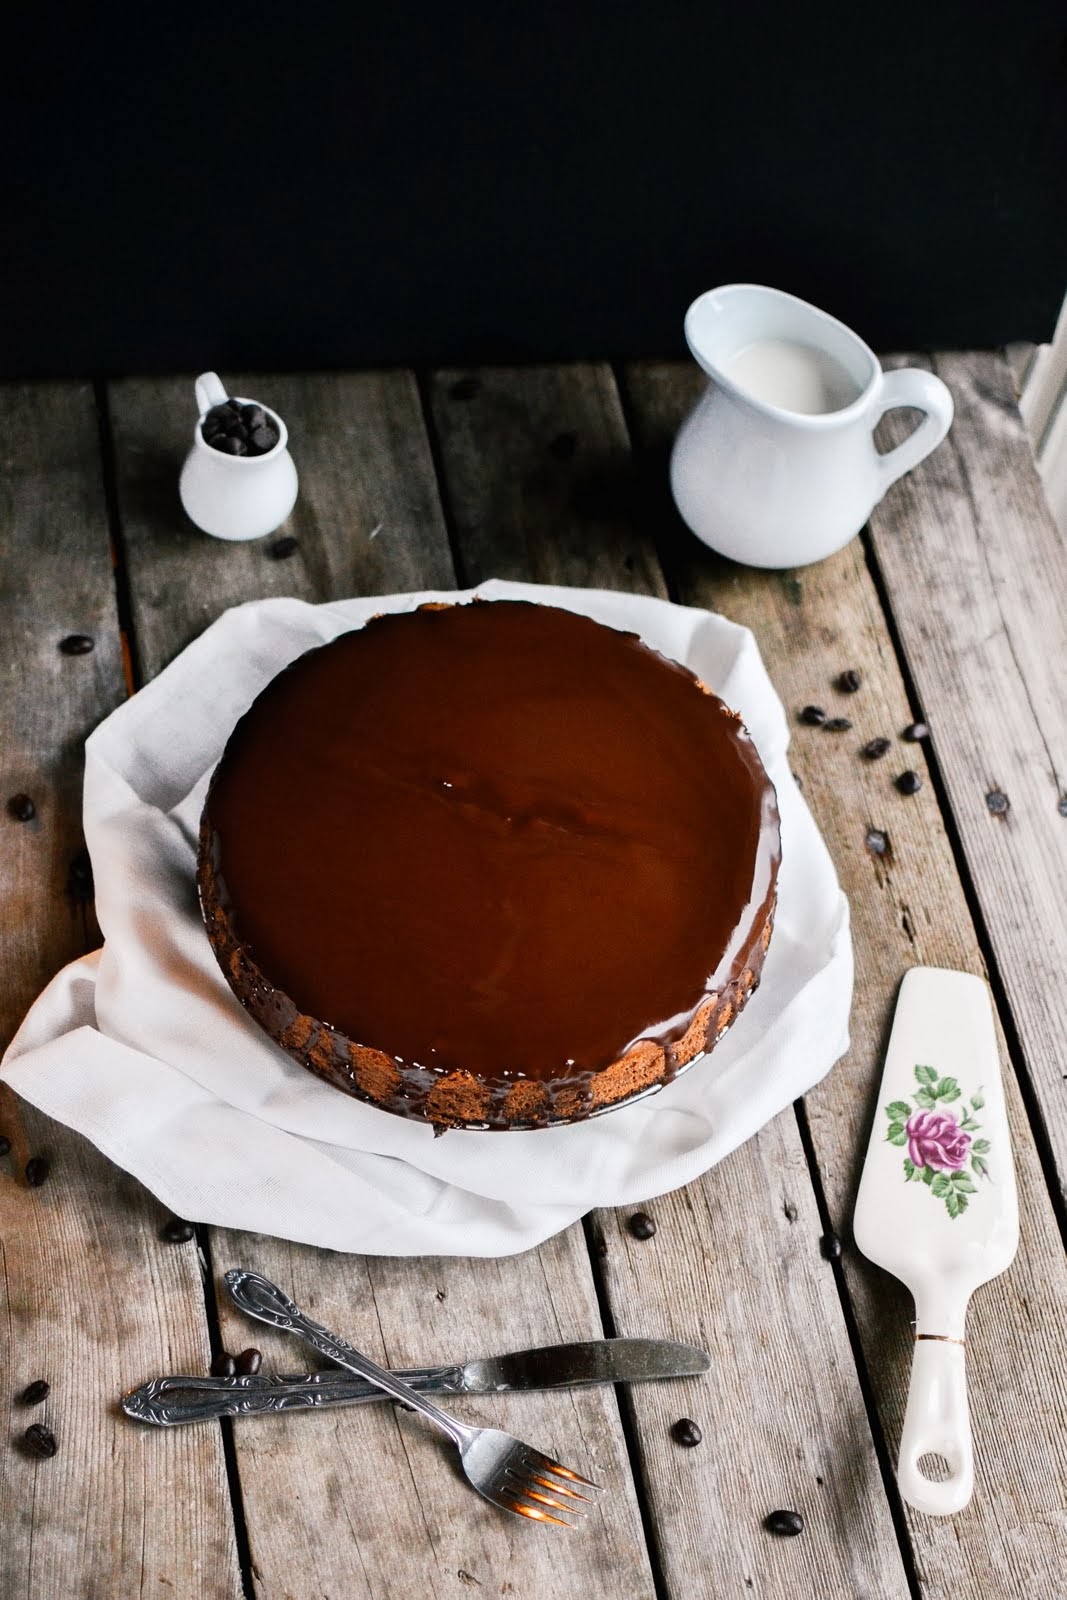
mocha cheesecake

0 comments

I could have titled this post: "the only cheesecake I ever make", because that is the truth.  
I've tried several other recipes for cheesecakes, but this one is my all-time favorite.  Since cheesecake is a relatively expensive dessert that I tend to only make once in a while (for special occasions!), I really don't like experimenting too much.  I just love this recipe too much!


Also, for those of you who aren't really coffee fans...fear not!  I'm totally not a coffee drinker (at all), and I can't get enough of this cake.  If you're still not sure, you can always leave out the instant coffee for an excellent chocolate cheesecake!

Mocha Cheesecake
from: Jean Pare - Company's Coming: Chocolate Everything

Ingredients:
1/3 cup margarine, melted
1 1/3 cups graham cracker crumbs
1/3 cup sugar
3 tbsp cocoa powder

3 oz semisweet chocolate chips
3 packages cream cheese (8 ounces each), softened to room temperature
1/2 cup sugar
1/2 cup brown sugar
2 tbsp flour
2 tsp vanilla
3 large eggs, at room temperature

1/4 cup milk
1 tbsp instant coffee granules

*whipped cream for topping (optional)

Directions:
Crust:
1)  In a small bowl, stir together margarine, crumbs, sugar and cocoa.
2)  Press into an ungreased 9-inch springform pan; set aside.

Cake:
1)  Melt chocolate using a double boiler (or in the microwave if you're very careful not to burn it!).  Set aside and let cool to room temperature once melted.
2)  Beat cream cheese, both sugars, flour and vanilla in a medium bowl.  Add in melted chocolate and beat until well mixed.
3)  Add eggs, one at a time, until just mixed.
4)  Stir together milk and instant coffee until granules are completely dissolved.  Add to the batter, mixing until just combined.
5)  Pour over crust.
6)  Bake at 300 degrees for about 1 1/2 hours until the center is almost set.
7)  When you've removed the cake from the oven, run a knife around the edges to help the cake settle without cracking.
8)  Chill for 8 hours or overnight.

Optional:
Chocolate Magic Shell Sauce:
Melt together 1/2 cup of chocolate (doesn't matter what kind!), and add 1 tbsp of coconut oil.  Stir together.
Pour over chilled cheesecake like you would a ganache, and the chocolate will form a shell!

*Our cheesecake was a teensy bit warm when we poured our magic shell over top, so that's why it looks a bit glossy still.  But if you've chilled your cake properly, or if you pop it back in the fridge once you've poured the chocolate over, then it will form a shell of chocolate that is so pretty!


This cake is long gone, but editing these photos were seriously making me drool.
#foodphotographerproblems

p.s. ♥ kelsey

tasty tuesday: salted caramel pretzel mocha cake (aka: an incredibly late birthday post)

0 comments

I am more than a little bit ashamed at how late this post is.

This ladies and gentlemen, is my birthday cake........from way back in October.
So yeah, procrastination for the win.

And I'm sure you're extremely surprised that it involves salted caramel, pretzels, and chocolate.  Ha!  Basically my favorite three food groups.  Really, the only three food groups there are.  Although maybe popcorn could be a fourth...

Anyway, this was my birthday cake, and it was pretty rad.  Thanks goes to Jordyn for being the master baker of this one, and complying to my every wish.  She's a pretty darn good sister!


I knew that I wanted chocolate cake, and our mocha cake recipe is simply the best.  And since I always want salted caramel on everything, that was a given.  We added pretzels in just for fun, since we had just made this ice cream, and were still pretty obsessed with the caramel pretzel combo.

The result was pretty delicious...although you must serve immediately and eat the whole thing, otherwise the pretzels get soggy due to the caramel.  Or you can just leave them out.  I do suppose it's a bit weird to have pretzels in a cake!

Salted Caramel Pretzel Mocha Cake
mocha cake recipe from: the Food Network

Ingredients
3 cups flour
1cup cocoa
2 tsp baking powder
1 tsp baking soda
1 tsp salt
2 1/2 cups sugar
4 Eggs
3 tsp Vanilla
2/3 cup of strongly brewed coffee or espresso
1 1/2 cup Vegetable Oil
1 1/2 cup hot water

Directions:
1) In a large bowl, sift together dry ingredients.
2) Add in eggs, vanilla, coffee and oil, and mix until batter is smooth.
3) Slowly add in hot water, until well mixed.
4)  Fill three, greased nine inch round pans about 3/4 full (you'll have enough extra batter to make a fourth round cake, or some cupcakes!)
5) Bake at 350 degrees for 25-30 minutes.


Salted Caramel Sauce

Ingredients
1/2 cup Sugar
3 TBSP Butter (we used salted butter!)
1/4 cup Whipping Cream

Directions
1)  The most important thing to do first is to assemble all of your ingredients!  Once your sugar mixture has reached the right colour, you'll need to move fairly quickly, and don't want to be fussing around with measuring out the other ingredients.
2)  Place your sugar in a medium saucepan, and melt at a medium heat.  Once it begins to melt, you'll want to start whisking it. (You can also add a tad of water if you don't feel comfortable melting dry sugar!).
3)  Once the sugar starts to boil, you can stop whisking, and wait for it to turn a light amber colour.
4)  When it's light amber, then add your butter, and stir like crazy!
5)  As soon as the butter has completely melted, remove from heat and add the whipping cream.  Again, stir like crazy! (Be cautious when adding the cream as it will foam a lot!)
6)  Let the caramel cool for a bit, and then you can move it to a heat proof container and pop it in the fridge to help hurry up the cooling process.


Buttercream

Ingredients
1/4 cup Butter (or margarine), at room temperature
1 1/2 cups Icing Sugar
1/2 tsp Caramel flavoring (or Vanilla)
1-3 TBSP Cream

Directions
1)  Begin by beating your butter on medium-high until well mixed.
2)  Add icing sugar, vanilla, and a couple tablespoons of cream.
3)  Beat on medium until combined.
4)  Adjust the taste and consistency by adding any of the above ingredients!


Ganache
Ingredients
4.5 oz of good quality dark chocolate, chopped
1 cup heavy cream

Directions
1)  In a small sauce pan, heat cream over medium heat and bring just barely to a boil.
2)  As soon as it comes to a boil, remove from heat and pour over chopped chocolate.
3)  Whisk until smooth.
4)  Wait for the ganache to cool for a bit before pouring over your cake.


Cake assembly:
1)  Start by leveling off the top of each cake so that you have a flat surface to work with.
2)  Place your first cake on a cake plate/serving dish, and apply a generous layer of buttercream just on top.
3)  Press pretzels into the icing, and pour cooled caramel over top.
4)  Add your second cake on top, and repeat steps 2 and 3.
5)  Add your third cake, and pour ganache over it all just before serving!

*You can also double the icing recipe to cover the cake, and do that instead of making a ganache.


Please forgive all the grain in these photos.  The sun had long since set when I was taking these outside, so the iso was cranked super high!


Happy Birthday to me....again, kind of.

Also, sparklers are my favorite.

p.s. ♥ kelsey (& jordyn)

moustache cake for movember

0 comments

Hello friends and Happy Movember!

Since November is drawing to a close, hopefully you've seen some magnificent moustaches (although I won't lie, I've definitely seen my fair share of sketchy ones).  Jordyn and I made a cake to celebrate, and were pretty stoked about finally using our giant moustache mold!


Why yes, that is a moustache comb in the photo above.  Doesn't everyone have one?

Mocha Cake
from: the Food Network

Ingredients:
1 1/2 cups flour
1/2 cup cocoa
1 tsp baking powder
1/2 tsp baking soda
1/2 tsp salt
1 1/4 cups sugar
2 eggs
1 1/2 tsp vanilla
1/3 cup of strongly brewed coffee or espresso
3/4 cup vegetable oil
3/4 cup hot water

Directions:
1) In a large bowl, sift together dry ingredients.
2) Add in eggs, vanilla, coffee and oil, and mix until batter is smooth.
3) Slowly add in hot water, until well mixed.
4) Bake at 350 degrees for 15-20 minutes, or until a toothpick comes out clean.
*If you're using a mold like ours, be sure to keep checking on it.  We noticed the ends of the moustache cooked quite a bit faster than the middle.  So make sure to be checking if the fattest part of the cake is done!


We chose a chocolate butter cream to top our moustache, but you could definitely do a regular butter cream and make it any colour you desire!

Jordyn used a butter knife to spread the icing, and then made small grooves in it for a bit of texture.  We think that shaved chocolate would also be a neat idea!


Happy Movember!

p.s. ♥ kelsey & jordyn

tasty tuesday: mocha coconut frappuccinos

0 comments

You know it is summer when Starbucks breaks out the mocha coconut frappucinos!!!

Wait, what?  Starbucks isn't offering them anymore?

Well we will have to do something about that.


This recipe is not exactly like Starbucks', with real coconut milk and melted dark chocolate, it is more like Starbucks' older, cooler brother.  And did I mention the homemade coconut whipped whipped cream?  


Mocha Coconut Frappuccino

Mocha Coconut Frappuccino (3-4 servings)
14 coffee ice cubes (just frozen coffee)
1 can coconut milk (We used Trader Joe's light coconut milk)
1 shot espresso
75 grams of melted dark chocolate (about 1/3 of a cup of chocolate chips)
1/4 cup of chocolate sauce (We used regular ice cream topping type sauce)

Throw all of this in a blender and mix until all the ice is blended! You can add extra ice/milk/coffee/chocolate! This is one of those recipes that you can easily adjust to your own taste. They do not taste exactly like Starbucks' version. You can definitely taste the real coconut and chocolate, and it is extremely rich! We garnished ours with toasted coconut, extra chocolate sauce, and coconut whipped cream of course!


Coconut Whipped Cream
1 can coconut cream (chilled overnight)
1 Tbsp icing sugar
1 tsp vanilla

Chill your can of coconut cream overnight. When you are ready, carefully flip the can over. The coconut solids will stay at the bottom of the can, while the coconut "water" will be at the top. Pour out the liquids, (you can save this and use it for a smoothie the next day! I did and it was delicious) and scoop the solids into a bowl. Use your beaters to whip the coconut solids into whipped coconut cream! It won't be quite as fluffy as regular whipped cream, and if you let it sit out too long it will get a bit droopy. Add the icing sugar and vanilla and beat again.


*Just a warning: this is not coconut flavoured whipped cream, which we were kind of expecting. The first bite is a bit surprising, but the flavour definitely grows on you! 

{If you want a more detailed tutorial click here to visit oh she glows! It has pictures and everything!}


This treat will make the perfect addition to the warm summer nights we are looking forward to!  


p.s.   jordyn (& kelsey)