Showing posts with label food. Show all posts

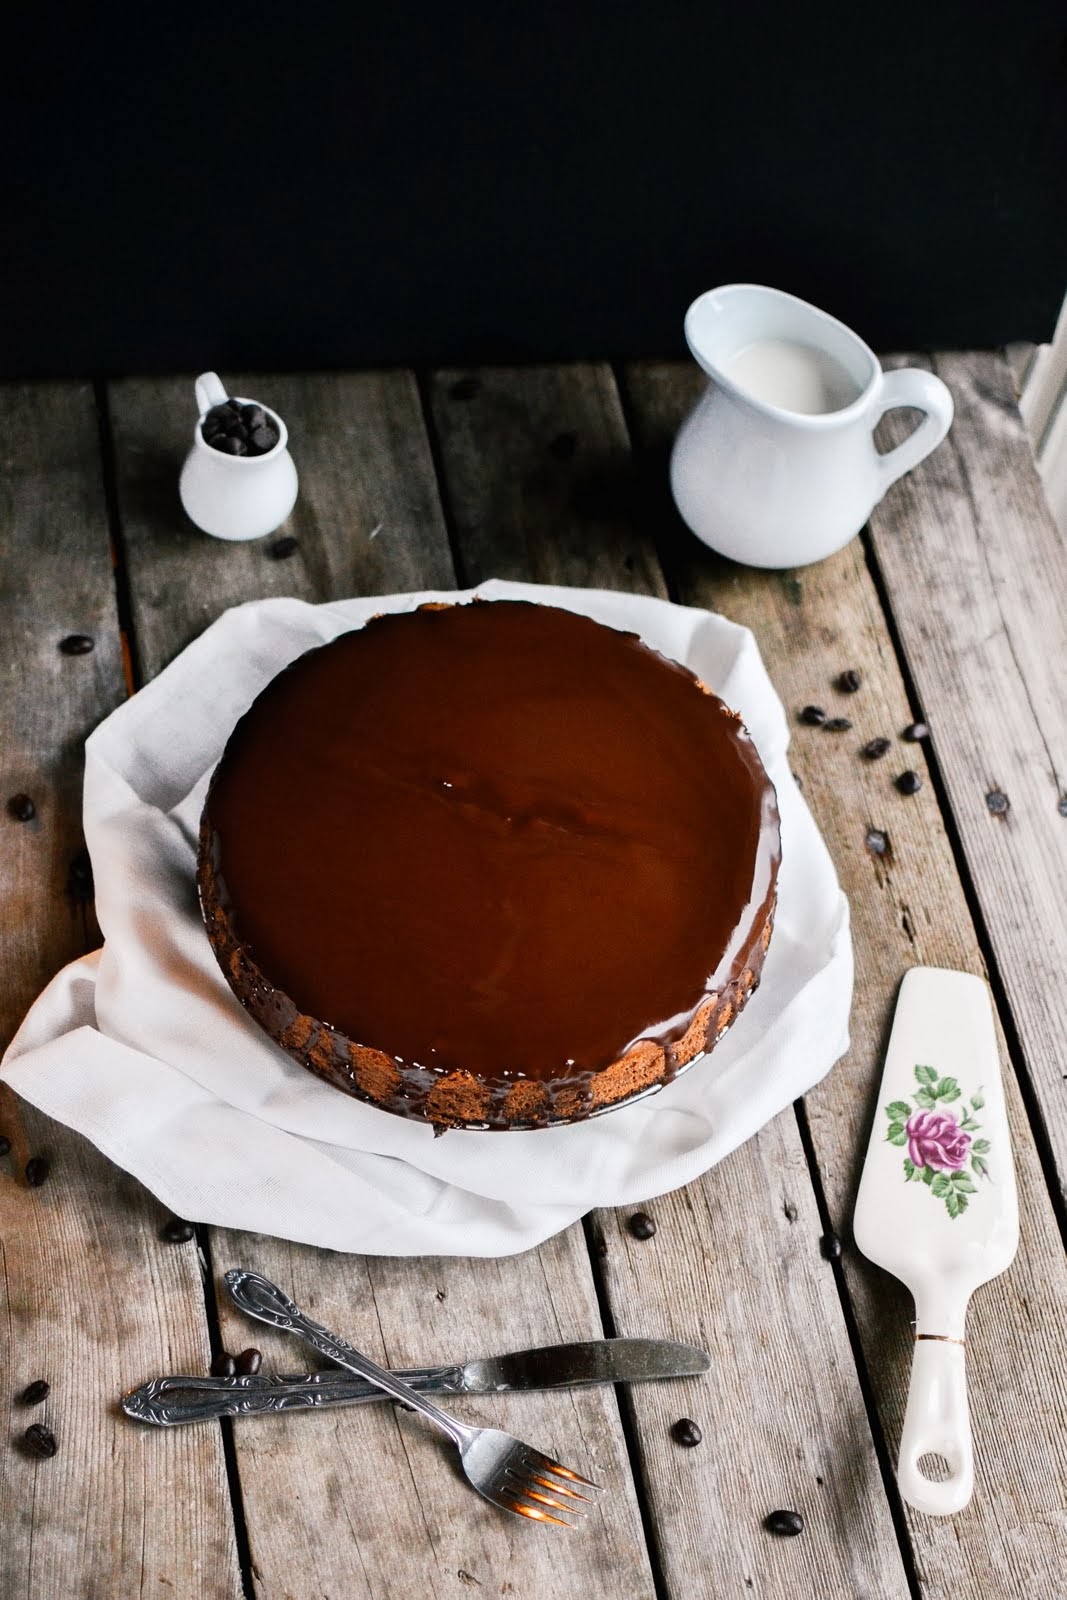
mocha cheesecake

0 comments

I could have titled this post: "the only cheesecake I ever make", because that is the truth.  
I've tried several other recipes for cheesecakes, but this one is my all-time favorite.  Since cheesecake is a relatively expensive dessert that I tend to only make once in a while (for special occasions!), I really don't like experimenting too much.  I just love this recipe too much!


Also, for those of you who aren't really coffee fans...fear not!  I'm totally not a coffee drinker (at all), and I can't get enough of this cake.  If you're still not sure, you can always leave out the instant coffee for an excellent chocolate cheesecake!

Mocha Cheesecake
from: Jean Pare - Company's Coming: Chocolate Everything

Ingredients:
1/3 cup margarine, melted
1 1/3 cups graham cracker crumbs
1/3 cup sugar
3 tbsp cocoa powder

3 oz semisweet chocolate chips
3 packages cream cheese (8 ounces each), softened to room temperature
1/2 cup sugar
1/2 cup brown sugar
2 tbsp flour
2 tsp vanilla
3 large eggs, at room temperature

1/4 cup milk
1 tbsp instant coffee granules

*whipped cream for topping (optional)

Directions:
Crust:
1)  In a small bowl, stir together margarine, crumbs, sugar and cocoa.
2)  Press into an ungreased 9-inch springform pan; set aside.

Cake:
1)  Melt chocolate using a double boiler (or in the microwave if you're very careful not to burn it!).  Set aside and let cool to room temperature once melted.
2)  Beat cream cheese, both sugars, flour and vanilla in a medium bowl.  Add in melted chocolate and beat until well mixed.
3)  Add eggs, one at a time, until just mixed.
4)  Stir together milk and instant coffee until granules are completely dissolved.  Add to the batter, mixing until just combined.
5)  Pour over crust.
6)  Bake at 300 degrees for about 1 1/2 hours until the center is almost set.
7)  When you've removed the cake from the oven, run a knife around the edges to help the cake settle without cracking.
8)  Chill for 8 hours or overnight.

Optional:
Chocolate Magic Shell Sauce:
Melt together 1/2 cup of chocolate (doesn't matter what kind!), and add 1 tbsp of coconut oil.  Stir together.
Pour over chilled cheesecake like you would a ganache, and the chocolate will form a shell!

*Our cheesecake was a teensy bit warm when we poured our magic shell over top, so that's why it looks a bit glossy still.  But if you've chilled your cake properly, or if you pop it back in the fridge once you've poured the chocolate over, then it will form a shell of chocolate that is so pretty!


This cake is long gone, but editing these photos were seriously making me drool.
#foodphotographerproblems

p.s. ♥ kelsey

tasty tuesday: bison cookies (chocolate sugar cookies)

0 comments


I am ridiculously excited to share these cookies with you all.  They are bison!!!  And they're hilarious.  Totally a man cookie.  So make these for your man friends and I guarantee they'll be pretty stoked (mine definitely were).

I made these bad boys as a snack for my mini Grey Cup party (that's like the Superbowl for Canadian football in case you're confused) I hosted a million years ago in November right before Christmas took over the blog.  Ha!  One of my friends has a dream to own a bison ranch when he "grows up", so I knew these would be perfect to make!


Jordyn and I debated doing gingerbread for the cookie base, but eventually decided that we wanted something a little simpler.  I decided that chocolate shortbread might be the way to go, however, recipe after recipe called for several hours of chilling the dough, and that just wasn't cool with my timeline.  So, we decided to just try something new!  Jordyn adapted our favorite sugar cookie recipe (see it here, here, and here!), and it turned out beautifully.

Chocolate Sugar Cookies
by: Jordyn Siemens

Ingredients
1/2 cup butter (room temperature)
3/4 cup sugar
2 tsp vanilla
1 egg
1 Tbsp milk
1 3/4 cups flour
1/4 cup cocoa powder
1 tsp baking powder

Directions
1) In a small bowl, cream butter - add sugar, vanilla, egg and milk; beat hard.
2) Add flour, cocoa powder and baking powder to cream mixture and beat again.
3) Roll onto a floured counter and cut into shapes.
4) Bake at 400 degrees F for 5-6 minutes.

Decorating
Icing (either soft butter cream or royal icing)
Chocolate sprinkles
Black icing (we bought a tube from Michaels)

1)  I used royal icing to outline where I wanted the bison's fur to be, leaving out the shape of the horn to fill in later.
2) Then I pressed chocolate sprinkles into the icing, and shook off any excess.
3)  Once the icing had set, I added in a small horn with white icing, as well as a black dot for eyes and black hooves.

*next time I'll use chocolate icing so that you can't see the white through the chocolate sprinkles.


I love how well these turned out, and am pretty stoked to have a new, no-fuss chocolate sugar cookie recipe.  It'll be great for more animal cookies that are sure to happen in the future!

p.s. ♥ kelsey

tasty tuesday: hunky bills

0 comments

Now Hunky Bills are actually something we make at Christmas time, but since I'm an excellent procrastinator (and life was nuts around Christmas), I'm just blogging about them now!  Really they would be a delicious treat all year round, we just happen to only make them once a year.  Which is probably good for my waistline!

Funny story:  their real name is definitely not Hunky Bills....but rather: Uncle Bill's Cuban Lunch.  Somehow, someway, over many many Christmases.....they slowly morphed into Hunky Bills.  
My family all knows it's not right, but we can't help that we call them that!  It's pretty hilarious.


Moving on.  These babies are another easy peasy recipe, where all you do is melt chocolate and stir deliciousness into it!  (Deliciousness being chips and peanuts....yum.)  
Man, I'm such a sucker for anything  sweet and salty!  Just so darn good.

Hunky Bills
from: my Auntie Bobbi

Ingredients:
3 cups chocolate chips
3 cups reese's peanut butter chips
200 grams plain Ripple Chips, crushed (these usually come in a 200 gram bag, so measuring is easy!)
2 1/2 cups salted peanuts, chopped

Directions:
1)  In a very large saucepan, first melt the peanut butter chips.  Add chocolate chips once the peanut butter chips are melted.  Stir together.
2)  Allow mixture to cool slightly, and then add crushed chips and chopped peanuts (you want the chunks of chips and peanuts pretty small).
3)  Line a mini cupcake pan with mini cupcake papers, and spoon the mixture into the papers.  Let them cool until firm enough to remove from pan.  
*We always pop ours in the freezer for a few minutes until hardened, remove the hunky bills, and then do another pan until all of the mixture is gone.


Soooo....once you've finally caved on your healthy New Year's Resolutions, you know where to find this recipe.  Ha!  They're totally worth it.  Promise.

p.s. ♥ kelsey

bacon jam

0 comments
I know what you're thinking... this is AMAZING. Best idea ever, right?! Bacon jam? A bacon themed Christmas on ps.heart? Yes. That's right. You're welcome. Bacon is the best, and this bacon jam is going to blow your bacon-loving mind, because this stuff is seriously delicious and addicting and epic beyond words. You might even be hailed as the favourite (friend/child/brother/sister/cousin/whatever it is you are) if you decide you can part with this goodness and gift it away!
Ingredients:

2 packs of bacon (each at 500g)
2 medium onions
3 garlic cloves
1/2 cup vinegar
1/2 cup coffee
1/2 cup maple syrup
2 tsp worcestershire sauce
1 tsp cinnamon
pepper and salt to taste

Instructions: 

1. Cut up your bacon into 1/2 inch strips. Dice your onions, and peel then smash up your garlic cloves.
2. Set a heavy skillet to med-high heat and begin cooking your bacon until it begins to brown. Keep your bacon fat! (cause really, if you're going for bacon jam, you might as well go all in).
3. Stir in your onions and cook until softened (8-10 minutes).
4. Add in your maple syrup, vinegar, coffee, and worcestershire sauce. Season with cinnamon, pepper, and salt. Continue to cook until the mixture has a glossy appearance and a syrup-like consistency (up to 1 hour). Don't forget to stir occasionally!
5. Let the mixture cool for 20 minutes, then stick it in the blender and puree. You don't want it to end up "pasty," so don't go to town while blending! It should still be thick and chunky at the end.
6. Enjoy the pure awesomeness that is now bacon jam! 

*Note: bacon jam can be refrigerated for approximately 1 month. Serve at room temperature.


Enjoy!

p.s. ♥ clara 

Christmas baking: turtle bars

0 comments

So here I am, more than halfway through December, about to start blogging about Christmas desserts.  Better a late than never, eh?

These turtle bars look beautiful on a plate of Christmas baking, and are a sure way to impress your friends, family, or maybe if even your boss! Ha!

Seriously, just look at those swirls.  I'm totally in love.  Plus, there's chocolate, pecans and caramel involved. Oh yum.


Turtle Bars

Bottom Layer:
1 cup Butter (room temperature)
3/4 cup of brown sugar
1 egg yolk
1 tsp vanilla
2 cups of flour
1/4 tsp salt

3/4 cup pecans

Directions:
1)  In a medium bowl, mix together butter, brown sugar, egg, and vanilla.
2)  Mix in flour and salt.
3) Grease a 9x13 pan and line with parchment (this makes removing and cutting your bars way easier).
5)  Dump your crumbs into the pan, spread out evenly, and press down gently.
6) Press pecans lightly into crust.
7) Bake at 350 degrees for 18 minutes, or until crust is lightly browned.
8) Let cool, and prepare caramel.


Caramel:
1 cup brown sugar
1 cup butter
1 cup sweetened condensed milk
4 tbsp corn syrup

Directions:
1)  In a large saucepan stir together brown sugar, butter, sweetened condensed milk and corn syrup.
2)  Cook on medium-high heat stirring constantly.  Boil for 4 minutes.
3) Let stand 2 minutes, and then pour over crust.
4) Place in the fridge to set.


Chocolate layer:
1 1/2 cups Chocolate (good quality)
1/2 cup whipping cream

White chocolate:
1/2 cup  (about 4 oz) White Chocolate - good quality
2 tbsp whipping cream

Directions:
1) In a small sauce pan (or a double boiler), melt down your chocolate and cream, watching carefully to make sure it doesn't burn.  Melt your white chocolate and whipping cream at the same time.
2)  Pour chocolate over the caramel layer.  Smooth evenly.
3)  Drop spoonfuls of white chocolate over this layer, and then run a knife through it to make swirls.  Starting from the middle of the white chocolate and spiraling seemed to have good results.
*One tip about marbling is to stop early!  It's easy to overdo it, and then it just looks messy.
4) Pop it in your fridge to let it set, and you're ready to go!  We store ours in the fridge/freezer, otherwise they get a bit soft.


Your crumbs might be a bit crumbly when you dump them in your pan.  Don't panic, that's completely normal, just press them in gently and they'll be fine.

We placed our white chocolate on in 6 equally spaced blobs, and then used a butter knife to swirl them around.  Be careful not to go too deep and hit the caramel layer.


Happy baking!

p.s. ♥ kelsey

Christmas Baking: 2012 recap

0 comments
Every year I think I'll be a little more on top of things, especially concerning the blog.  Alas, I haven't been able to blog any Christmas recipes yet!  To make up for it, I thought I'd share some of my favorite recipes from last year, which are some of my family's favorites.

          
 White chocolate peppermint bark               Toffee pretzel bark                              Rainbow bars

          
              Butter tarts                             Chocolate mint patty cookies                  North Pole cupcakes

Get ready for an explosion of Christmas baking coming at you in the next week!  My family's been baking up a storm, and I can't wait to share.

p.s.  ♥ kelsey

tasty tuesday: caramel apples

0 comments

Caramel apples are just one of those classic Fall foods that I honestly can't get enough of.  We always sell them during September and October during our apple festivals on the farm, so I'm spoiled with a steady supply of them.  A farm down the road makes them for us, using our own apples, and they are so wonderful.  Due to this, I had never actually made my own caramel apples from scratch!

I can now cross that off my bucket list though, because these beauts were completely homemade.  Not even halfway homemade with store-bought caramels. No way.  Although the ingredient list might make your teeth hurt by just looking at it.....hehe.  I will tell you that these are hands down the best caramel apples I've eaten!  The only thing that is keeping me from making them every day is because they take quite a bit of patience for your caramel to reach the right temperature.  And if you know me....you'll know that patience is one of my strong suits.  Ha!


This caramel has a beautiful colour, and is so creamy and rich.  It went so well with the tart Elstar apples that it covered, and made many mouths quite happy.  The extra caramel was used for dipping apples in over the next couple of days....and we also made some homemade turtles with it.  Delish.

Caramel Apples
recipe from: Sprinkle Bakes

Ingredients:
12 small/medium tart apples (I used Elstar apples)
popsicle sticks (I used cake pop sticks, which got a bit soggy and then weren't quite strong enough!)
1 can sweetened condensed milk
2/3 cup heavy whipping cream
1 cup light corn syrup
1 cup brown sugar, lightly packed
1 cup white sugar
1/2 butter
1 tsp vanilla extract

*you will need a candy thermometer for this recipe!

Directions:
1)  First, place a large sheet of parchment or wax paper on a work surface that will be able to hold all of your apples without them touching each other.  Set aside.
2)  Clean and dry your apples (the caramel won't stick if they're wet at all!).  Remove the apple stems, and punch a guide hole for your stick using a metal skewer or skinny knife.  Insert stick into each apple, and make sure it's secure.
3)  For the caramel: in a 4-cup liquid measuring cup, stir together the sweetened condensed milk and heavy cream.  Set aside.
4)  In a large pot, combine corn syrup, brown sugar, and white sugar.  Bring to a simmer over high heat.  When the mixture boils, add the butter.  Stir until the butter is melted, and reduce the heat to medium-high.
5)  Add milk mixture in a small steady stream, whisking continually.  You want the caramel to keep boiling slightly.
6)  Reduce heat to medium, and attach a candy thermometer to your pot.  Be careful that the candy thermometer does not touch the bottom of your pot, as it will give you a false temperature reading.
7)  Bring to 250 degrees F.  This will take approximately 15 minutes or so.  So be patient!
8)  Remove from heat and stir in vanilla extract.
9)  Wait until the bubbling stops, and the caramel has a smooth glassy surface.  Tilt pan slightly so that caramel is deeper on one side, and start dipping apples.  Cover apples completely in caramel, and twirl and gently tap the stick on the side of the pot to help excess caramel drip off.  Place on parchment to set for about an hour.  Serve and enjoy!
[Optional]: Immediately after dipping, roll your apple in chopped nuts, chocolate, skor bits, coconut, etc.
Keep extras in the fridge until you're ready to eat them!


You may have noticed the mini caramel apples in a few of these pictures.  We used a melon baller to carve out some mini apple balls for dipping.  While this idea was great in theory, they ended up being a bit too wet, and the caramel slid off most of them.  Sad day.


My favorite combo of flavors was definitely the pretzel covered apples.  Sweet and salty will always get me.  The extra crunch from the pretzels was also a lovely addition!

So, be creative and make these yummy treats!

p.s. ♥ kelsey