Showing posts with label autumn. Show all posts

outfit post: peter pan collar & pastels

0 comments

I really really love peter pan collars.
I'm shocked that my wardrobe doesn't contain more items with them, but I'm working on remedying that.  I found this top on ruche during a mega sale, and I'm in love!  I love pale pinks, and the lace detailing is just lovely.  I paired it with my mint pants and simple flats, and since it's Fall, and a bit chilly, I added my new favorite navy blazer for warmth!


 blazer: the gap // top: ruche // pants: stitches // shoes: charlotte russe

In other news, I'm off the Edmonton to visit Clara TOMORROW!   I cannot even express how excited I am.  I love that girl so much!

p.s. ♥ kelsey

tasty tuesday: caramel apples

0 comments

Caramel apples are just one of those classic Fall foods that I honestly can't get enough of.  We always sell them during September and October during our apple festivals on the farm, so I'm spoiled with a steady supply of them.  A farm down the road makes them for us, using our own apples, and they are so wonderful.  Due to this, I had never actually made my own caramel apples from scratch!

I can now cross that off my bucket list though, because these beauts were completely homemade.  Not even halfway homemade with store-bought caramels. No way.  Although the ingredient list might make your teeth hurt by just looking at it.....hehe.  I will tell you that these are hands down the best caramel apples I've eaten!  The only thing that is keeping me from making them every day is because they take quite a bit of patience for your caramel to reach the right temperature.  And if you know me....you'll know that patience is one of my strong suits.  Ha!


This caramel has a beautiful colour, and is so creamy and rich.  It went so well with the tart Elstar apples that it covered, and made many mouths quite happy.  The extra caramel was used for dipping apples in over the next couple of days....and we also made some homemade turtles with it.  Delish.

Caramel Apples
recipe from: Sprinkle Bakes

Ingredients:
12 small/medium tart apples (I used Elstar apples)
popsicle sticks (I used cake pop sticks, which got a bit soggy and then weren't quite strong enough!)
1 can sweetened condensed milk
2/3 cup heavy whipping cream
1 cup light corn syrup
1 cup brown sugar, lightly packed
1 cup white sugar
1/2 butter
1 tsp vanilla extract

*you will need a candy thermometer for this recipe!

Directions:
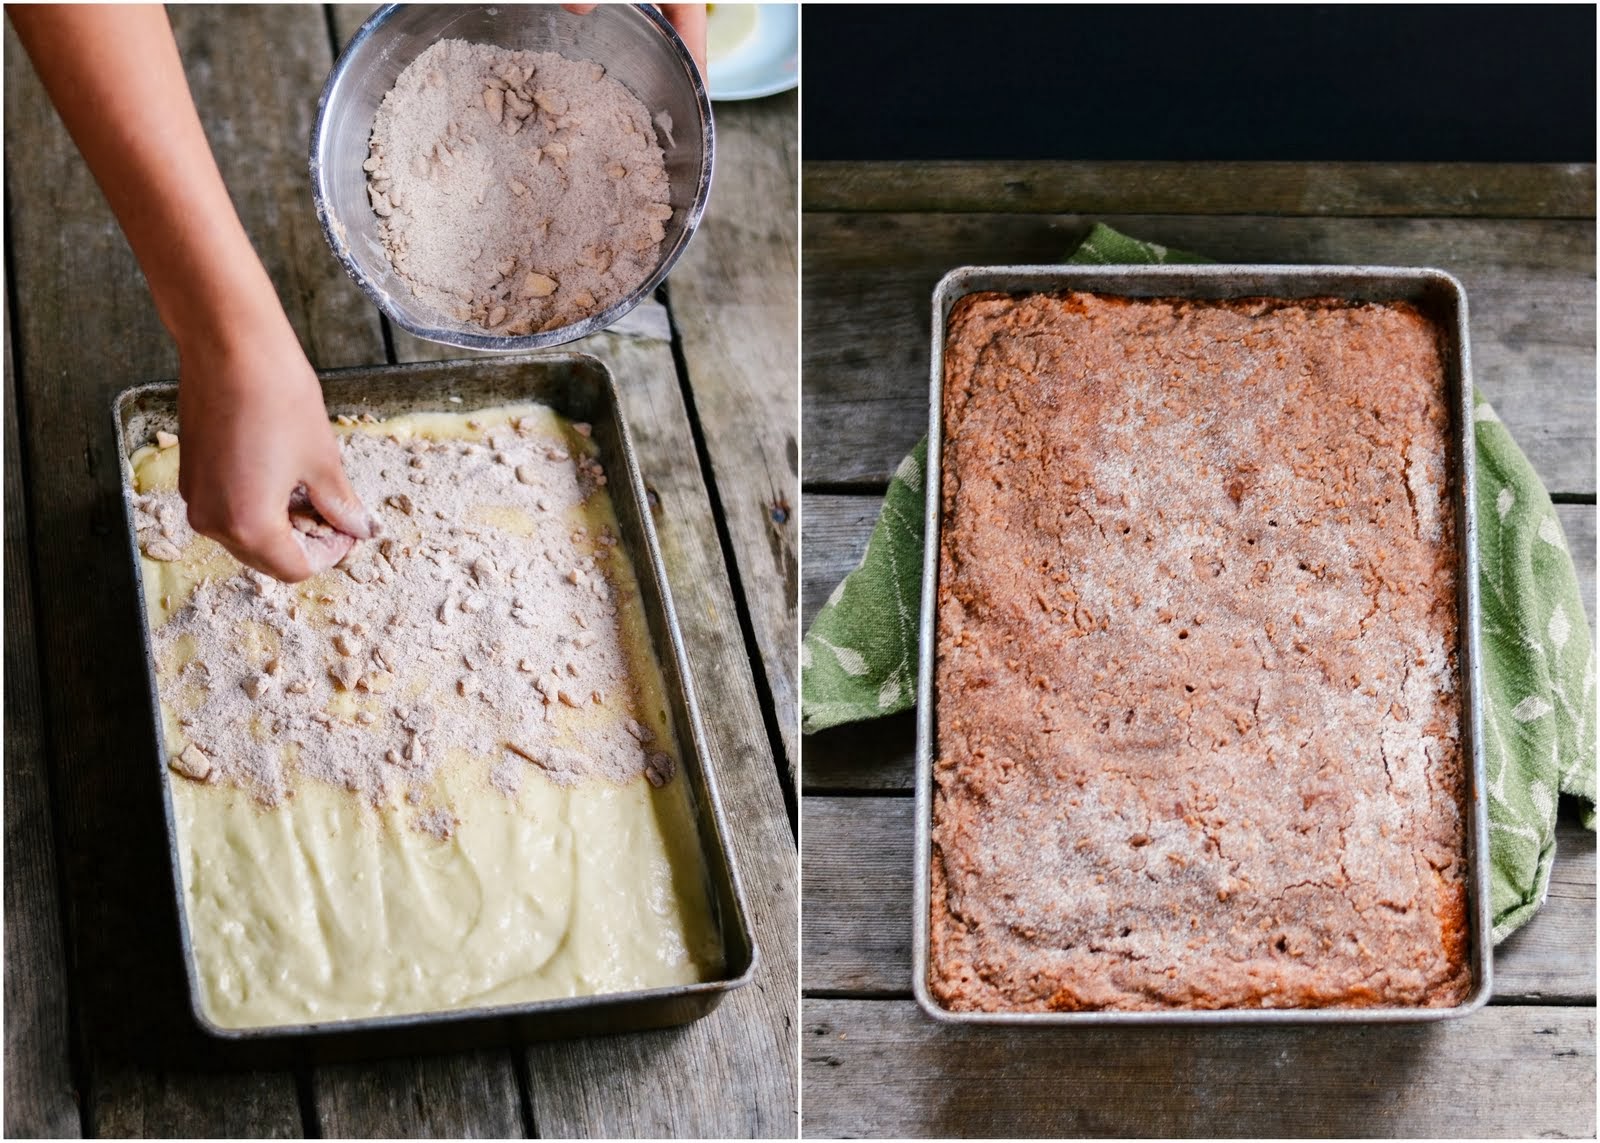
1)  First, place a large sheet of parchment or wax paper on a work surface that will be able to hold all of your apples without them touching each other.  Set aside.
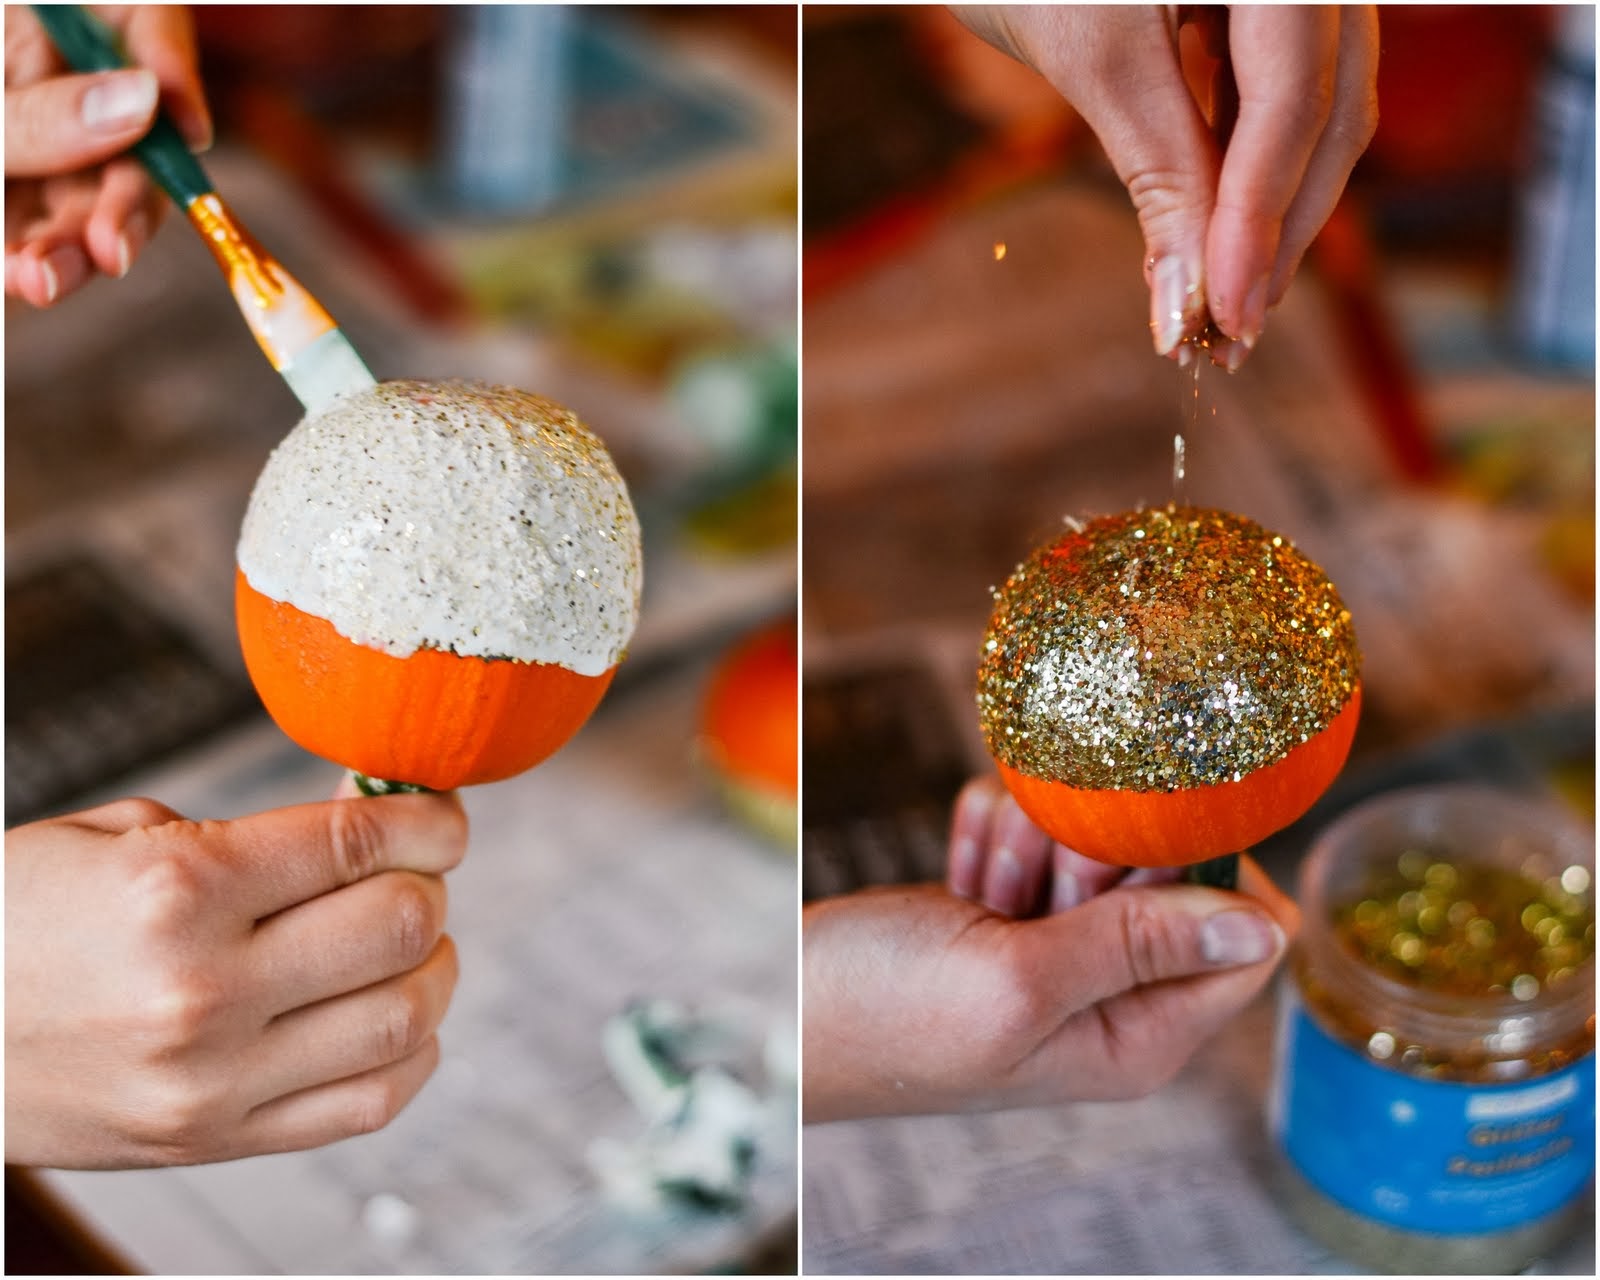
2)  Clean and dry your apples (the caramel won't stick if they're wet at all!).  Remove the apple stems, and punch a guide hole for your stick using a metal skewer or skinny knife.  Insert stick into each apple, and make sure it's secure.
3)  For the caramel: in a 4-cup liquid measuring cup, stir together the sweetened condensed milk and heavy cream.  Set aside.
4)  In a large pot, combine corn syrup, brown sugar, and white sugar.  Bring to a simmer over high heat.  When the mixture boils, add the butter.  Stir until the butter is melted, and reduce the heat to medium-high.
5)  Add milk mixture in a small steady stream, whisking continually.  You want the caramel to keep boiling slightly.
6)  Reduce heat to medium, and attach a candy thermometer to your pot.  Be careful that the candy thermometer does not touch the bottom of your pot, as it will give you a false temperature reading.
7)  Bring to 250 degrees F.  This will take approximately 15 minutes or so.  So be patient!
8)  Remove from heat and stir in vanilla extract.
9)  Wait until the bubbling stops, and the caramel has a smooth glassy surface.  Tilt pan slightly so that caramel is deeper on one side, and start dipping apples.  Cover apples completely in caramel, and twirl and gently tap the stick on the side of the pot to help excess caramel drip off.  Place on parchment to set for about an hour.  Serve and enjoy!
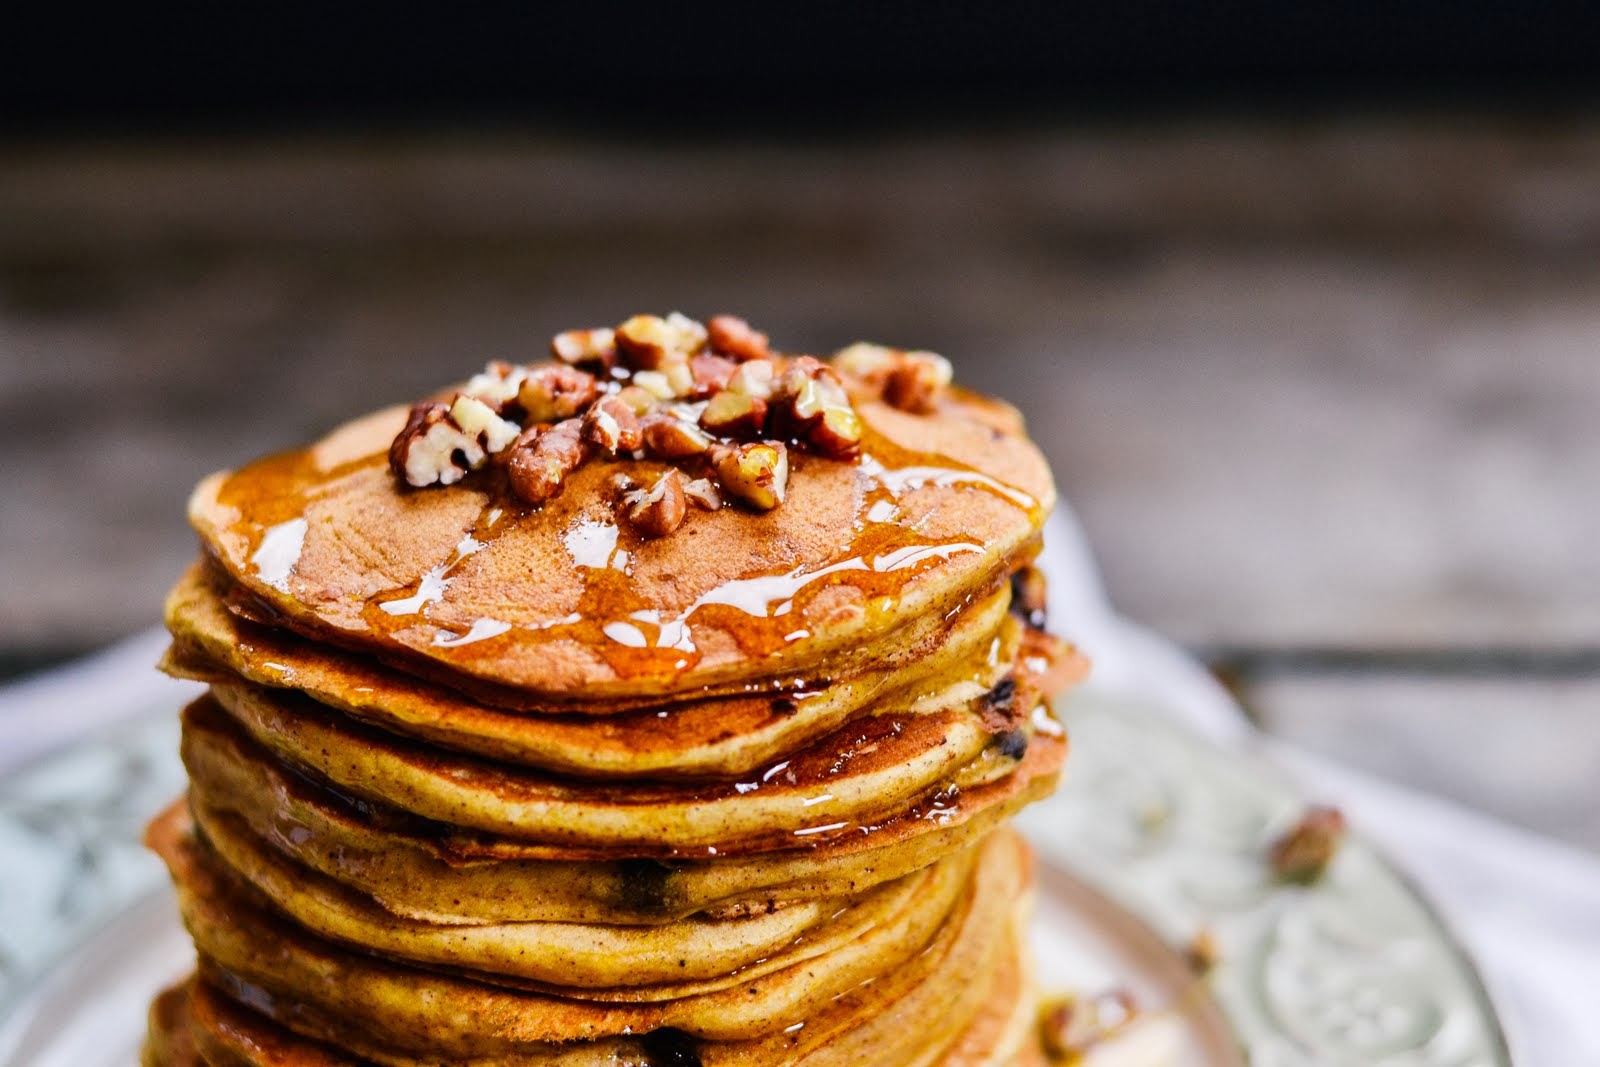
[Optional]: Immediately after dipping, roll your apple in chopped nuts, chocolate, skor bits, coconut, etc.
Keep extras in the fridge until you're ready to eat them!


You may have noticed the mini caramel apples in a few of these pictures.  We used a melon baller to carve out some mini apple balls for dipping.  While this idea was great in theory, they ended up being a bit too wet, and the caramel slid off most of them.  Sad day.


My favorite combo of flavors was definitely the pretzel covered apples.  Sweet and salty will always get me.  The extra crunch from the pretzels was also a lovely addition!

So, be creative and make these yummy treats!

p.s. ♥ kelsey

diy: black and white painted pumpkins

0 comments

Today I have another simple idea for decorating pumpkins that doesn't involve carving (in case you missed it, I made dip dyed glitter pumpkins last week)!  I decided to do some simple colour blocking with black and white, and I love how they came out.


Materials:
-pumpkins
-acrylic paint
-paint brush
-tape

Directions:
First I taped off each pumpkin, either diagonally, horizontally through the middle, or crisscrossing across the top.  Then, I simply painted the areas I wanted black or white, and left them to dry.  I did one coat of paint for the black, and two for the white paint.  Once they were completely dry, I carefully removed the paint.

*Of course I couldn't resist adding a bit of glitter to one pumpkin, and just painted on a bit of modge podge and sprinkled some glitter on!


The possibilities are endless, and I think that silver and gold paint would look pretty awesome as well.
Happy pumpkin painting!

p.s. ♥ kelsey

tasty tuesday: apple streusel coffee cake

0 comments

Coffee cakes are one of my favorite cakes.  Second only perhaps, to chocolate cake.  Depends on my mood I suppose.  And coffee cakes in Fall are just plain delightful.  There's something so cozy about them, and the fact that they usually contain cinnamon makes them even more wonderful.

This recipe came from my friend Rachel, and I am so in love with it.  You've got cinnamon, apples, and a streusel topping....what more could you ask for?  So much goodness.


Make this on a crisp Fall day, and serve with hot coffee!
Or hot chocolate, or milk, or whatever.  For those of us that aren't really into coffee...

Apple Streusel Coffee Cake

Ingredients:
2 tbsp white vinegar
1 3/4 cup milk

3/4 cup butter, softened
1 3/4 cups white sugar
2 large eggs
1 tsp vanilla
3 cups flour
2 tsp baking powder
1 tsp baking soda
1/4 tsp salt
2 medium cooking apples, peeled, cored and thinly sliced (I used elstars)

Streusel topping:
2/3 cup white sugar
1/2 cup flour
2 tsp cinnamon
1/4 cup butter, cold

Directions:
1)  In a large liquid measuring cup, combine milk and vinegar and let stand for 10 minutes to sour.
2)  Next, mix together streusel topping: Combine sugar, flour, and cinnamon together in a small bowl.  Cut in butter until you have coarse crumbs.  Set aside.
3)  Now you can start getting the cake batter ready.  Beat butter and sugar together in a large bowl until light and creamy.
4)  Add eggs, one at a time, beating well after each addition.
5)  Add vanilla and mix well.
6)  Combine flour, baking powder, baking soda and salt in a medium bowl.
7)  Add flour mixture to butter mixture in four additions, alternating with the milk mixture in three additions. (You want to start and end with adding the flour mixture).  Mix together until just combined.
8)  Spread about half the cake batter into a greased, 9x13 pan.  
9)  Place apple slices close together in a single layer over the batter, and then sprinkle with about half of the streusel topping over the apples.
10)  Spread the remaining batter over everything, and sprinkle the remaining streusel topping on top.
11)  Bake at 350 degree for 50-55 minutes, or until a toothpick comes out clean.


p.s. ♥ kelsey

diy: dip-dye glitter pumpkins

0 comments

Oh man, am I ever in love with my latest project!  Dip-dye glitter pumpkins!

I've had this idea in my head for a while, and was so happy that it came out exactly like I wanted.  Kind of rustic/farm-y mixed with glam.


I think these would make such fun and versatile decorations, from adding a bit of sparkle to your home, or they could even be used as part of a center piece for Thanksgiving or a Fall wedding.

Materials:
-pumpkin(s)
-glitter
-modgepodge
-tape
-paintbrush

Instructions:
1)  First make sure your pumpkins are clean and dry.
2)  I chose to only glitter half of my pumpkins, so I used masking tape to tape about halfway down my pumpkin.  Or you could freehand it if you really wanted to.
3)  Paint on modgepodge wherever you want glitter, then sprinkle glitter generously over the modgepodge.
4)  Shake off extra glitter, and touch up any spots you missed.
5)  Once your pumpkins have completely dried, it's a good idea to gently paint on another coat of modge podge!  This will dry clear (I promise...mine did!), and will help keep the glitter from getting on absolutely everything.


I hope you all have a fun and tasty Thanksgiving weekend!  Our farm is going to be absolutely bonkers busy, but I'm thankful that I get to spend it with my family!

p.s. ♥ kelsey

tasty tuesday: pumpkin pancakes

0 comments

Some days it's just not your day.  And you have three epic recipe fails in a row.  
Let's just say that last Sunday was not my day.  It was a very humbling experience to have so many catastrophes in the kitchen....and looking back on it, I can finally see the humour in it.  Pumpkin pancakes were one of these fails, and I actually made 3 different batches until I was finally happy with the end result!

So, I now present to you....pumpkin pancakes!  These are delicious, cozy, and are absolute perfection on a crisp Fall morning.


I've been trying not to overload you guys too much on pumpkin and apple recipes, but I have stopped resisting...so be prepared!  And let us know in the comments if there are any recipes in particular you'd like to see.

In the meantime, you should probably make these for breakfast tomorrow, or lunch, or supper....or heck, just for a snack!  You can always stick them in the fridge for the next day, or pop them in the freezer for later.

Pumpkin Pancakes
adapted from: allrecipes.com
yields: about 12 pancakes

Ingredients:
1 1/2 cups of milk
1 cup pumpkin puree
1 egg
2 tbsp vegetable oil
2 tbsp white vinegar
2 cups all-purpose flour
3 tbsp brown sugar (packed)
2 tsp baking powder
1 tsp baking soda
1 tsp ground allspice
3 tsp cinnamon
1/2 tsp salt

[optional]: 1 cup chocolate chips (or chopped pecans)

Directions:
1)  In a large bowl, mix together milk, pumpkin, egg, oilk and vinegar.
2)  In a small bowl, mix together the flour, brown sugar, baking powder and soda, allspice, cinnamon and salt.
3)  Stir the dry ingredients into the wet until just mixed.
4)  Heat a greased frying pan (or griddle) over medium high heat.
5)  Pour batter onto the pan, flipping when bubbles appear on one side.  Brown both sides, and serve hot.*

*I used a 1/4 cup to ladle out the batter, and then used the back of a large spoon to spread out the batter a bit.  


And you don't need to grease your pan/griddle after every pancake.  Do it before you start, and then again every 3 to 4 pancakes (or whenever you notice them start to stick!).  Not greasing your pan will give you nicer, more even colouring on your pancakes!

Also, it's a good idea to cut open the first one or two you do to make sure they're not gummy inside.  If they are, just turn down your burner/griddle slightly.


Oh yes, I topped them with chopped pecans and they were perfection!

Now go!  Make pancakes!

p.s. ♥ kelsey


tasty tuesday: apple crisp

0 comments


Oh yes...more apple recipes!  It started with pie last week, and it's not going to stop for a long time.  

More apple, pumpkin, and squash recipes will be coming at you like crazy for the next few weeks.  What can I say?  We love Fall, and it helps when you live on an apple/pumpkin farm and have an endless supply of delicious fall fruit!


Crisps are definitely one of the easiest desserts in the world...and yet they're so dang delicous!  You just throw fruit in a pan, top it with crumbs, and bam...you have a mouthwatering creation on your hands.

Oh yeah...don't forget to add ice cream!

Apple Crisp

Ingredients:
8 cups chopped tart apples (we used Elstar)*
2 tsp flour
1 tsp cinnamon

3/4 cup flour
1 1/2 tsp baking powder
pinch of salt
1/3 cup butter (cold)
1 cup brown sugar
1 cup rolled quick cooking oats

Directions:
Fruit Layer:
1) Mix together chopped apples, cinnamon and flour.  Place in a greased 9x13 pan.

Crumb Topping Layer:
1) In a medium bowl, mix together the flour and baking powder.
2) Then, cut in cold butter with a pastry cutter or a fork until the mixture resembles coarse crumbs.
3) Stir in brown sugar and oats.
4) Sprinkle crumbs over fruit evenly.

Bake at 350 degrees for 40-50 minutes, or until the top is lightly browned and the apple pieces are tender.   Cook time will depend on how big your apple chunks are....so just keep checking it!

(If your crumbs are brown, but your apples are still crunchy, just loosely place a piece of tinfoil on top of the pan to keep the crumbs from getting any browner while it cooks a bit longer!)


Let us know if you have any suggestions for Fall treats!  We'd love to hear them.

p.s.   kelsey