diy: comic book coasters

0 comments
(Disclaimer: If cutting up comic books upsets/offends you....please look away!)

Yes, we chopped up comic books (again).  No, don't give us that look!
Batman coasters are the bomb.

Now since we're all a bit geeky here at p.s.heart, you shouldn't really be surprised at this diy (remember Jordyn's comic book shoes?).  Jordyn was brainstorming ideas for diy projects that she could give to her boyfriend, his family, as well as our good friends Karson and Ashley, and this is what she came up with!

Jordyn was inspired by this diy, and his etsy shop Cheltenham Road is pretty rad as well, in case you'd rather buy than make coasters similar to these.


Jordyn asked for my help with these, and she can attest to the fact that I may have been a teensy bit bossy with my "advice".  I can't help it!  It must be an older sister thing.  However, I'm happy to say that in the end she did admit that the idea I pushed for was a good one and ended up saving us a lot of work.  Score one for bossy older sisters.

Materials:
-old/new/ugly coasters* (we found ours at a dollar store)
-paint (if you need to paint over ugly coasters)
-comic books (that you don't mind cutting up)
-mod podge
-paint brush
-cardstock (thick paper)
-scissors/paper cutter
-pencil

Notes before you start:
*We decided to just find some cheap coasters at a dollar store, and they worked out super well.  Unfortunately I forgot to grab a before photo of them, but they were just ugly tile ones with "inspirational" words on them, and a cork bottom.  Since comic book pages are thin, we decided to paint the coasters white so that nothing would show through, and it gave them a nice clean look.

*We used a paper cutter to get a really straight edge, but scissors will work if you're careful.  Jordyn and I also though it looked better to cut our template just a teeny bit smaller than our coaster to leave a small border of white showing on the coaster, but that's up to you!

*If you're really hardcore, you can also use outdoor mod podge instead of the regular stuff for a slightly tougher coaster!

Directions:
1)  If you need to, paint one or two coats of white paint on your coasters, and let dry.
2)  Place one of the coasters on a sheet of cardstock, trace around the coaster, and then cut it out.  This will give you a template for cutting out the correct size from your comic book.
3)  Flip through your chosen comic to find fun panels that would look good on your size of coaster.  Use your template to trace out the shape, and cut it out.
4)  Spread a very thin layer of mod podge over your coaster, and carefully place your chosen comic book piece over top.  Smooth out any bubbles, and let dry.
5)  Repeat steps 3 and 4 until all coasters are done.
6)  Now, spread a very thing layer of mod podge over top of each coaster, as well as over the edges. We used a plastic pastry scraper to smooth out any bubbles that popped up, but anything with a straight edge would work.
7)  Repeat step 6 at least twice for each coaster, allowing each coat to dry completely.
8)  Use and enjoy!


We were ecstatic with how these turned out, and are happy to say that everyone who received them for Christmas loved them too.

As you can tell, our friends love Batman, but you can easily customize them to suit whatever comic book you (or your friends) fancy.  Another alternative might be to try using scrapbooking paper, old sheet music, etc.  The possibilities are endless!

p.s. ♥ kelsey & jordyn

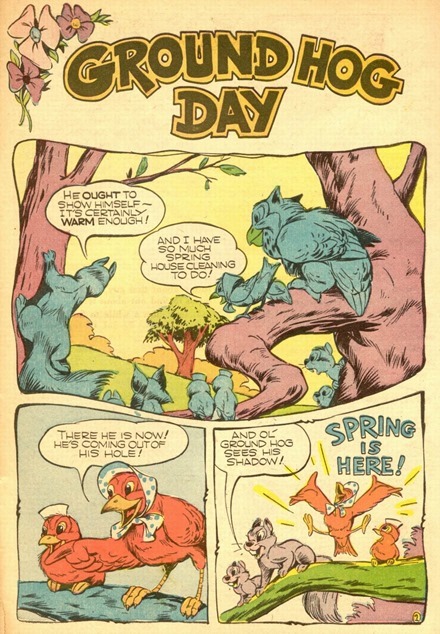
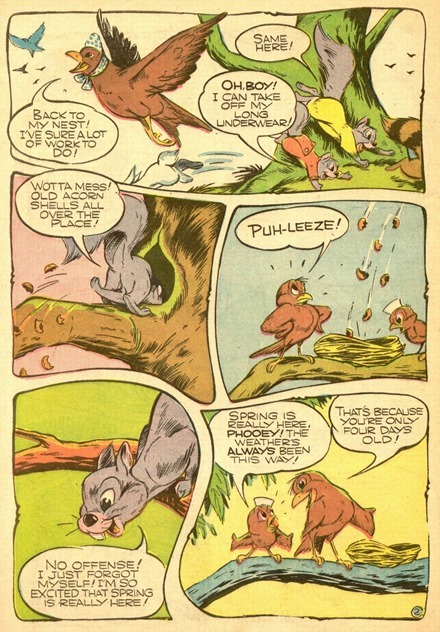
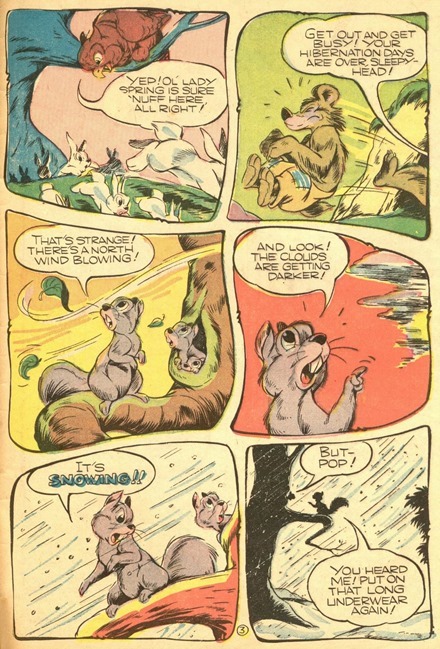
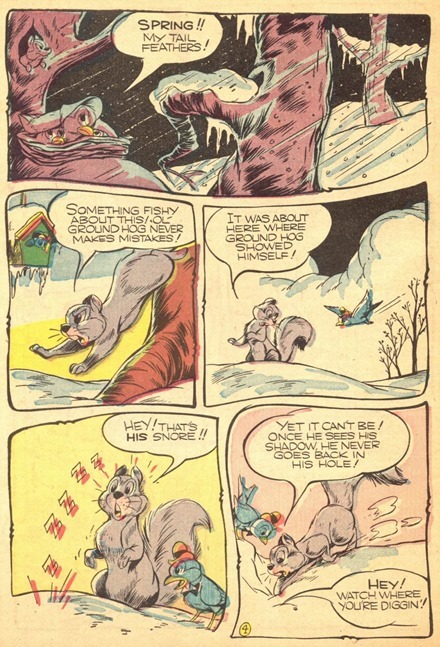
Groundhog Day – Funny Animal Comics by Animator Ken Hultgren

0 comments
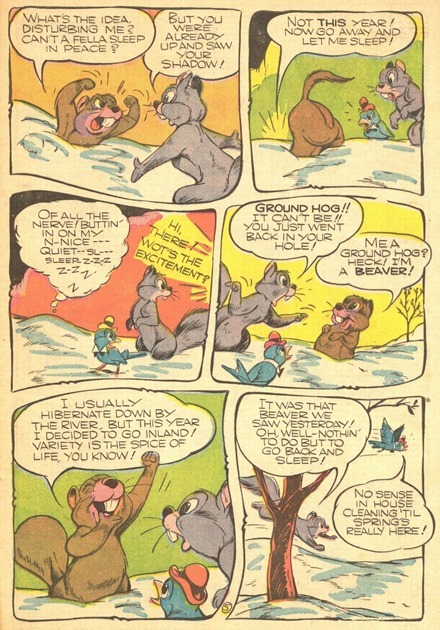
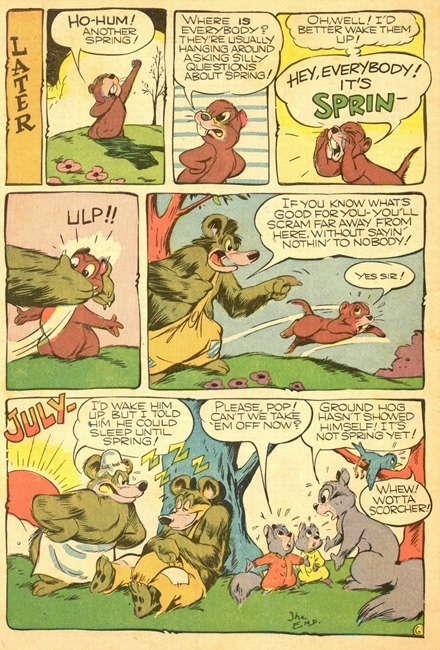
Groundhog Day is on Sunday, so to celebrate, here's a beautiful comic book story from veteran animator Ken Hultgren...

Cartoon birds squirrels and treesCartoon birds squirrels and treesCartoon bear birds squirrels and treesCartoon birds squirrels trees and snowCartoon birds squirrels groundhogCartoon birds squirrels groundhog bear

outfit post: cat tights

0 comments

An important step you must complete on your way to becoming a crazy cat lady is purchasing a pair of cat tights.  I can now check that off my to-do list!

I have absolutely no shame, and am so so in love with these.  I first wore them in Edmonton when I was out visiting Clara, and to say she was a bit horrified would be an understatement. Ha!  She's not really a cat person, and I got quite a bit of enjoyment over her revulsion.

(She does like kittens though....so all hope is not lost yet).

Anyway, moving on....This dress is the newest in my quite large collection of lace dresses.  It's mint lace, has a sweetheart neckline, short sleeves, and the length actually hits my knees instead of mid-thigh like every other dress out there.  I can't wait for the weather to warm up so that I can wear it without tights!

I got it on a wicked sale at urban outfitters, so it was dirt cheap.  Man, do I love sales!

dress: urban outfitters // cardigan: front and co (consignment) // tights: ebay // shoes: charlotte russe


These photos were taken in Edmonton by Clara (thank you again!), as you maybe guessed by all the snow!  Did I mention that it was a balmy 12 degrees and beautifully sunny in Abbotsford today?  (For those of you who live in California/southern U.S.,/southern hemisphere this is something to brag about!)

I hope you all are having a lovely weekend!

p.s. ♥ kelsey


tasty tuesday: bison cookies (chocolate sugar cookies)

0 comments


I am ridiculously excited to share these cookies with you all.  They are bison!!!  And they're hilarious.  Totally a man cookie.  So make these for your man friends and I guarantee they'll be pretty stoked (mine definitely were).

I made these bad boys as a snack for my mini Grey Cup party (that's like the Superbowl for Canadian football in case you're confused) I hosted a million years ago in November right before Christmas took over the blog.  Ha!  One of my friends has a dream to own a bison ranch when he "grows up", so I knew these would be perfect to make!


Jordyn and I debated doing gingerbread for the cookie base, but eventually decided that we wanted something a little simpler.  I decided that chocolate shortbread might be the way to go, however, recipe after recipe called for several hours of chilling the dough, and that just wasn't cool with my timeline.  So, we decided to just try something new!  Jordyn adapted our favorite sugar cookie recipe (see it here, here, and here!), and it turned out beautifully.

Chocolate Sugar Cookies
by: Jordyn Siemens

Ingredients
1/2 cup butter (room temperature)
3/4 cup sugar
2 tsp vanilla
1 egg
1 Tbsp milk
1 3/4 cups flour
1/4 cup cocoa powder
1 tsp baking powder

Directions
1) In a small bowl, cream butter - add sugar, vanilla, egg and milk; beat hard.
2) Add flour, cocoa powder and baking powder to cream mixture and beat again.
3) Roll onto a floured counter and cut into shapes.
4) Bake at 400 degrees F for 5-6 minutes.

Decorating
Icing (either soft butter cream or royal icing)
Chocolate sprinkles
Black icing (we bought a tube from Michaels)

1)  I used royal icing to outline where I wanted the bison's fur to be, leaving out the shape of the horn to fill in later.
2) Then I pressed chocolate sprinkles into the icing, and shook off any excess.
3)  Once the icing had set, I added in a small horn with white icing, as well as a black dot for eyes and black hooves.

*next time I'll use chocolate icing so that you can't see the white through the chocolate sprinkles.


I love how well these turned out, and am pretty stoked to have a new, no-fuss chocolate sugar cookie recipe.  It'll be great for more animal cookies that are sure to happen in the future!

p.s. ♥ kelsey

“Tack’s Cartoon Tips for the Aspiring Cartoonist” (1923) Vintage Book on How to Draw Cartoons

0 comments
Brand-new high-res scans from “Tack’s Cartoon Tips for the Aspiring Cartoonist” (1923) — I’ll be posting the whole book on my “How to Draw Cartoons” page at https://www.facebook.com/CartoonTips

tasty tuesday: salted caramel pretzel mocha cake (aka: an incredibly late birthday post)

0 comments

I am more than a little bit ashamed at how late this post is.

This ladies and gentlemen, is my birthday cake........from way back in October.
So yeah, procrastination for the win.

And I'm sure you're extremely surprised that it involves salted caramel, pretzels, and chocolate.  Ha!  Basically my favorite three food groups.  Really, the only three food groups there are.  Although maybe popcorn could be a fourth...

Anyway, this was my birthday cake, and it was pretty rad.  Thanks goes to Jordyn for being the master baker of this one, and complying to my every wish.  She's a pretty darn good sister!


I knew that I wanted chocolate cake, and our mocha cake recipe is simply the best.  And since I always want salted caramel on everything, that was a given.  We added pretzels in just for fun, since we had just made this ice cream, and were still pretty obsessed with the caramel pretzel combo.

The result was pretty delicious...although you must serve immediately and eat the whole thing, otherwise the pretzels get soggy due to the caramel.  Or you can just leave them out.  I do suppose it's a bit weird to have pretzels in a cake!

Salted Caramel Pretzel Mocha Cake
mocha cake recipe from: the Food Network

Ingredients
3 cups flour
1cup cocoa
2 tsp baking powder
1 tsp baking soda
1 tsp salt
2 1/2 cups sugar
4 Eggs
3 tsp Vanilla
2/3 cup of strongly brewed coffee or espresso
1 1/2 cup Vegetable Oil
1 1/2 cup hot water

Directions:
1) In a large bowl, sift together dry ingredients.
2) Add in eggs, vanilla, coffee and oil, and mix until batter is smooth.
3) Slowly add in hot water, until well mixed.
4)  Fill three, greased nine inch round pans about 3/4 full (you'll have enough extra batter to make a fourth round cake, or some cupcakes!)
5) Bake at 350 degrees for 25-30 minutes.


Salted Caramel Sauce

Ingredients
1/2 cup Sugar
3 TBSP Butter (we used salted butter!)
1/4 cup Whipping Cream

Directions
1)  The most important thing to do first is to assemble all of your ingredients!  Once your sugar mixture has reached the right colour, you'll need to move fairly quickly, and don't want to be fussing around with measuring out the other ingredients.
2)  Place your sugar in a medium saucepan, and melt at a medium heat.  Once it begins to melt, you'll want to start whisking it. (You can also add a tad of water if you don't feel comfortable melting dry sugar!).
3)  Once the sugar starts to boil, you can stop whisking, and wait for it to turn a light amber colour.
4)  When it's light amber, then add your butter, and stir like crazy!
5)  As soon as the butter has completely melted, remove from heat and add the whipping cream.  Again, stir like crazy! (Be cautious when adding the cream as it will foam a lot!)
6)  Let the caramel cool for a bit, and then you can move it to a heat proof container and pop it in the fridge to help hurry up the cooling process.


Buttercream

Ingredients
1/4 cup Butter (or margarine), at room temperature
1 1/2 cups Icing Sugar
1/2 tsp Caramel flavoring (or Vanilla)
1-3 TBSP Cream

Directions
1)  Begin by beating your butter on medium-high until well mixed.
2)  Add icing sugar, vanilla, and a couple tablespoons of cream.
3)  Beat on medium until combined.
4)  Adjust the taste and consistency by adding any of the above ingredients!


Ganache
Ingredients
4.5 oz of good quality dark chocolate, chopped
1 cup heavy cream

Directions
1)  In a small sauce pan, heat cream over medium heat and bring just barely to a boil.
2)  As soon as it comes to a boil, remove from heat and pour over chopped chocolate.
3)  Whisk until smooth.
4)  Wait for the ganache to cool for a bit before pouring over your cake.


Cake assembly:
1)  Start by leveling off the top of each cake so that you have a flat surface to work with.
2)  Place your first cake on a cake plate/serving dish, and apply a generous layer of buttercream just on top.
3)  Press pretzels into the icing, and pour cooled caramel over top.
4)  Add your second cake on top, and repeat steps 2 and 3.
5)  Add your third cake, and pour ganache over it all just before serving!

*You can also double the icing recipe to cover the cake, and do that instead of making a ganache.


Please forgive all the grain in these photos.  The sun had long since set when I was taking these outside, so the iso was cranked super high!


Happy Birthday to me....again, kind of.

Also, sparklers are my favorite.

p.s. ♥ kelsey (& jordyn)

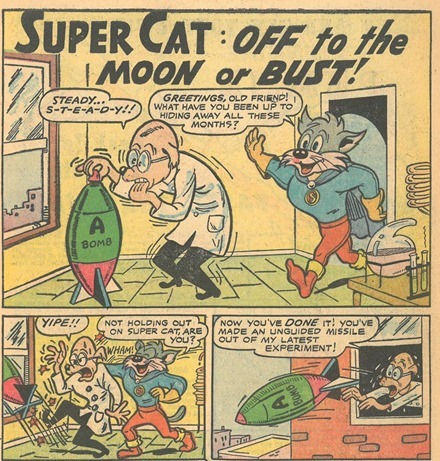
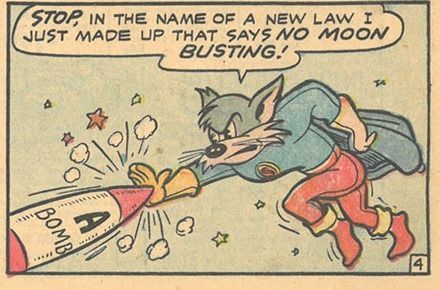
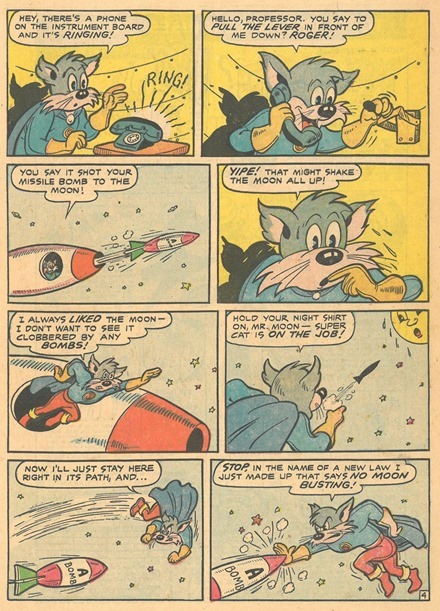
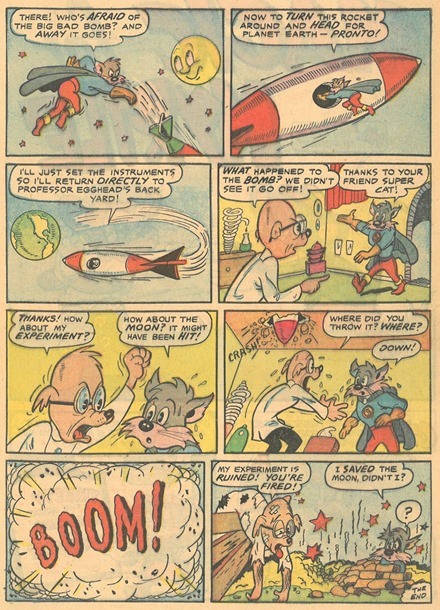
Super-Cat in “Off to the Moon or Bust!”

0 comments
Super Cat Ajax Farrell comic book scans 01_cr
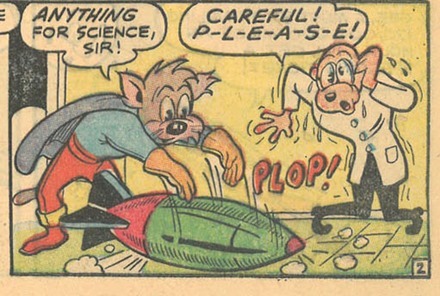
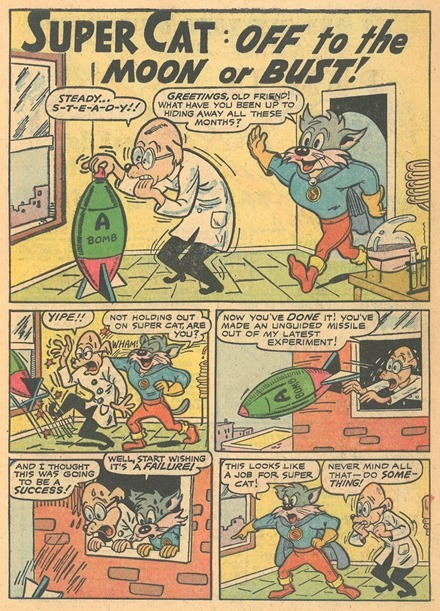
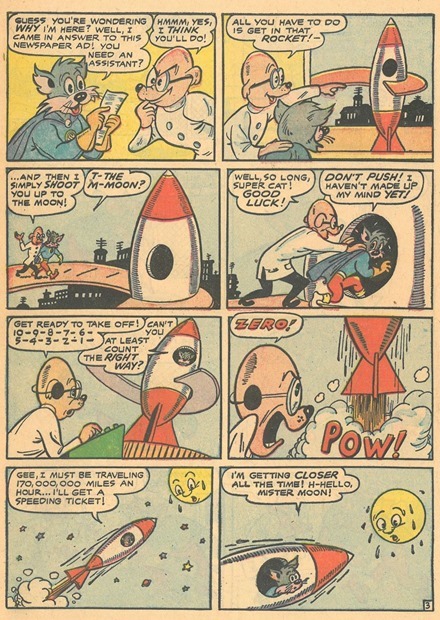
Have you ever read those amazing Super Mouse comics by Milt Stein? Well, these Super-Cat comics are nothing like those. They’re clumsily drawn and the story is so stupid that it’s charming.
Super Cat Ajax Farrell comic book scans 04_cr
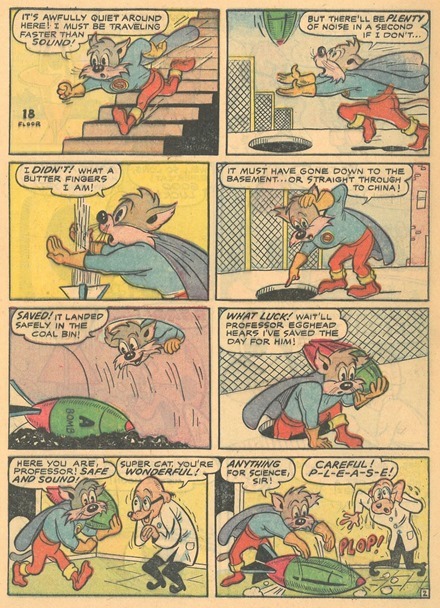
OK…to be fair, this Super-Cat is really just a parody place-holder than a real character like Super Mouse was. Super-Cat’s total obliviousness is kinda fun…
Super Cat Ajax Farrell comic book scans 02_cr
I’m just fascinated by the clunky off-kilter low-rent second-string execution of this story. The first three panels are so incredibly dopey that I was hooked right away Smile Enjoy!
Super Cat Ajax Farrell comic book scans 01Super Cat Ajax Farrell comic book scans 02Super Cat Ajax Farrell comic book scans 03Super Cat Ajax Farrell comic book scans 04Super Cat Ajax Farrell comic book scans 05
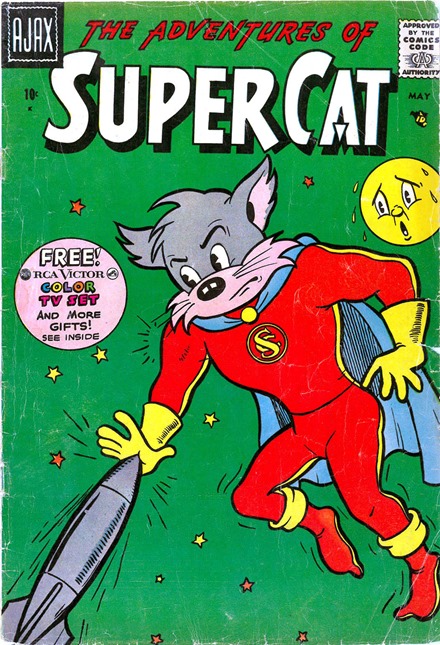
from Super-Cat Volume 1, Number 4
Published by Ajax-Farrell in May 1958
Super Cat Ajax Farrell comic book scans cover