
Oh man, am I ever in love with my latest project! Dip-dye glitter pumpkins!
I've had this idea in my head for a while, and was so happy that it came out exactly like I wanted. Kind of rustic/farm-y mixed with glam.

I think these would make such fun and versatile decorations, from adding a bit of sparkle to your home, or they could even be used as part of a center piece for Thanksgiving or a Fall wedding.
Materials:
-pumpkin(s)
-glitter
-modgepodge
-tape
-paintbrush
Instructions:
1) First make sure your pumpkins are clean and dry.
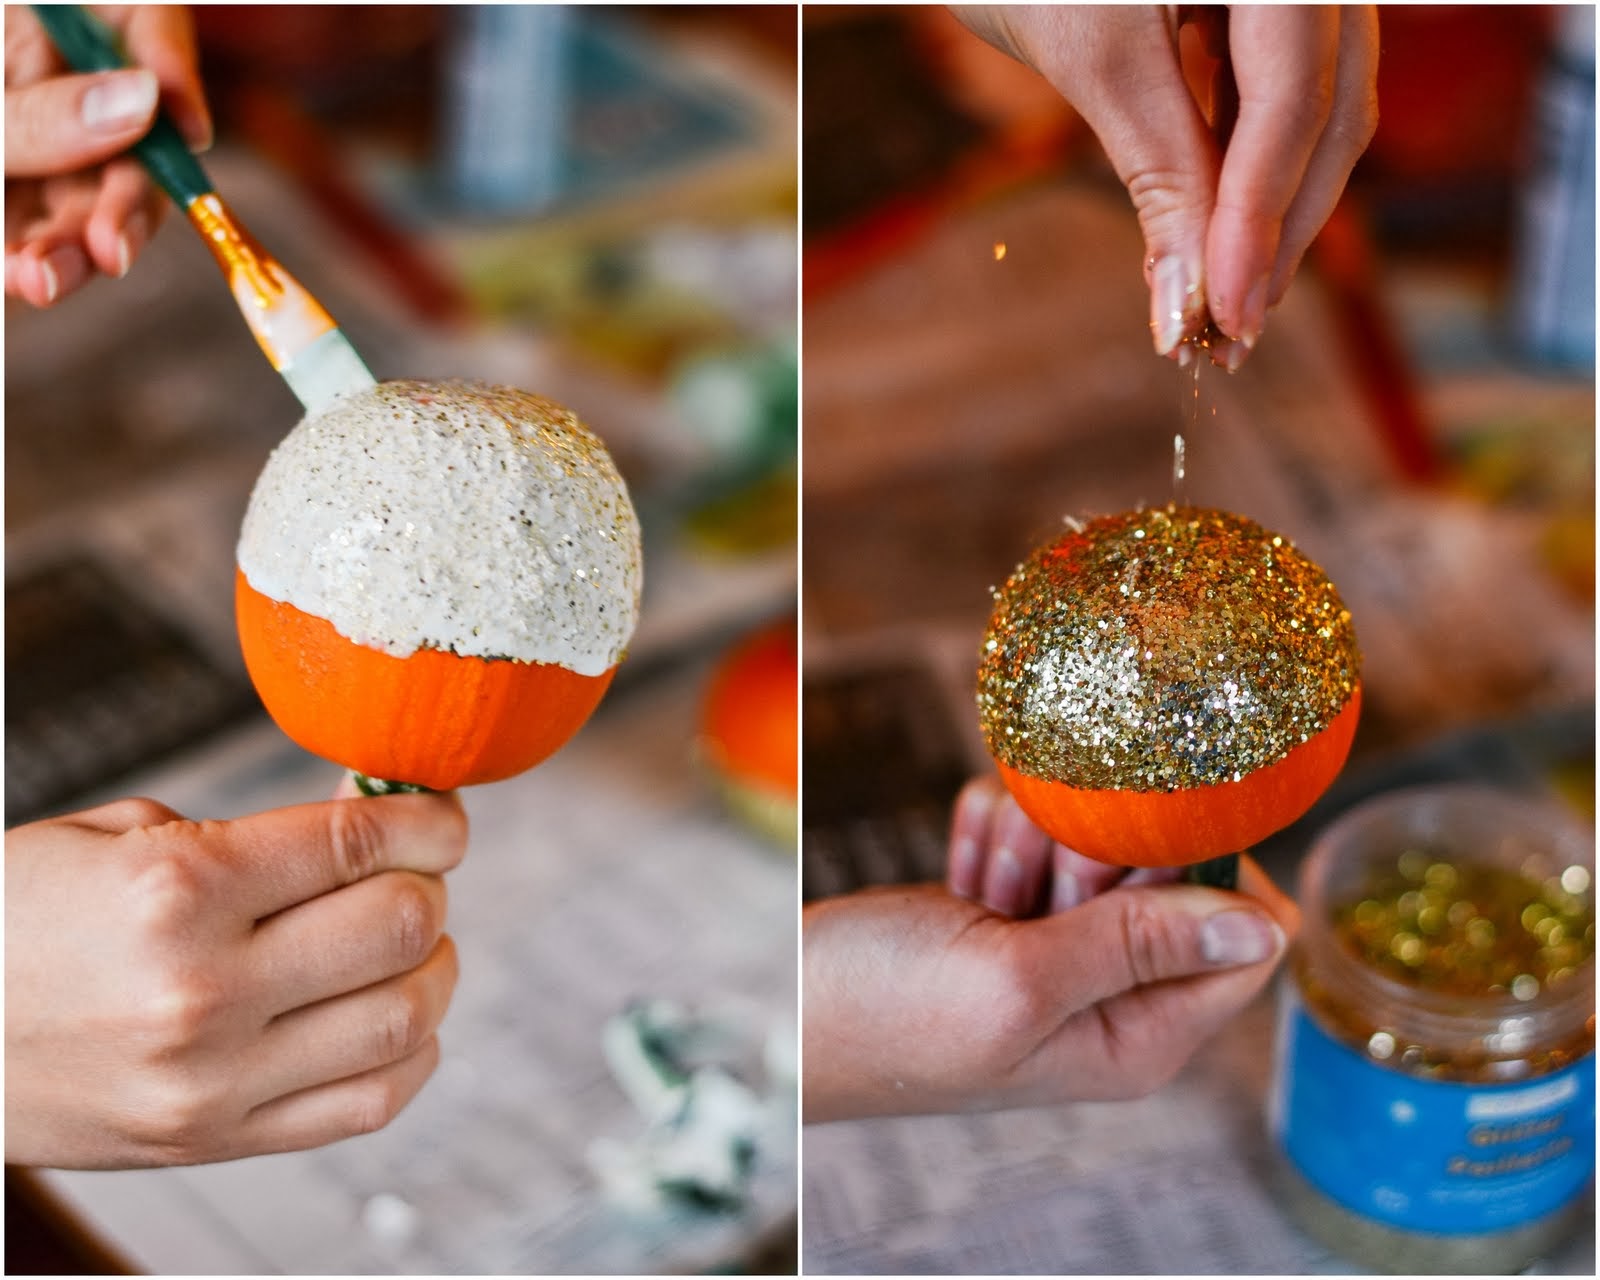
2) I chose to only glitter half of my pumpkins, so I used masking tape to tape about halfway down my pumpkin. Or you could freehand it if you really wanted to.
3) Paint on modgepodge wherever you want glitter, then sprinkle glitter generously over the modgepodge.
4) Shake off extra glitter, and touch up any spots you missed.
5) Once your pumpkins have completely dried, it's a good idea to gently paint on another coat of modge podge! This will dry clear (I promise...mine did!), and will help keep the glitter from getting on absolutely everything.


I hope you all have a fun and tasty Thanksgiving weekend! Our farm is going to be absolutely bonkers busy, but I'm thankful that I get to spend it with my family!
p.s. ♥ kelsey
0 comments:
Post a Comment