Showing posts with label craft. Show all posts

diy: comic book coasters

0 comments
(Disclaimer: If cutting up comic books upsets/offends you....please look away!)

Yes, we chopped up comic books (again).  No, don't give us that look!
Batman coasters are the bomb.

Now since we're all a bit geeky here at p.s.heart, you shouldn't really be surprised at this diy (remember Jordyn's comic book shoes?).  Jordyn was brainstorming ideas for diy projects that she could give to her boyfriend, his family, as well as our good friends Karson and Ashley, and this is what she came up with!

Jordyn was inspired by this diy, and his etsy shop Cheltenham Road is pretty rad as well, in case you'd rather buy than make coasters similar to these.


Jordyn asked for my help with these, and she can attest to the fact that I may have been a teensy bit bossy with my "advice".  I can't help it!  It must be an older sister thing.  However, I'm happy to say that in the end she did admit that the idea I pushed for was a good one and ended up saving us a lot of work.  Score one for bossy older sisters.

Materials:
-old/new/ugly coasters* (we found ours at a dollar store)
-paint (if you need to paint over ugly coasters)
-comic books (that you don't mind cutting up)
-mod podge
-paint brush
-cardstock (thick paper)
-scissors/paper cutter
-pencil

Notes before you start:
*We decided to just find some cheap coasters at a dollar store, and they worked out super well.  Unfortunately I forgot to grab a before photo of them, but they were just ugly tile ones with "inspirational" words on them, and a cork bottom.  Since comic book pages are thin, we decided to paint the coasters white so that nothing would show through, and it gave them a nice clean look.

*We used a paper cutter to get a really straight edge, but scissors will work if you're careful.  Jordyn and I also though it looked better to cut our template just a teeny bit smaller than our coaster to leave a small border of white showing on the coaster, but that's up to you!

*If you're really hardcore, you can also use outdoor mod podge instead of the regular stuff for a slightly tougher coaster!

Directions:
1)  If you need to, paint one or two coats of white paint on your coasters, and let dry.
2)  Place one of the coasters on a sheet of cardstock, trace around the coaster, and then cut it out.  This will give you a template for cutting out the correct size from your comic book.
3)  Flip through your chosen comic to find fun panels that would look good on your size of coaster.  Use your template to trace out the shape, and cut it out.
4)  Spread a very thin layer of mod podge over your coaster, and carefully place your chosen comic book piece over top.  Smooth out any bubbles, and let dry.
5)  Repeat steps 3 and 4 until all coasters are done.
6)  Now, spread a very thing layer of mod podge over top of each coaster, as well as over the edges. We used a plastic pastry scraper to smooth out any bubbles that popped up, but anything with a straight edge would work.
7)  Repeat step 6 at least twice for each coaster, allowing each coat to dry completely.
8)  Use and enjoy!


We were ecstatic with how these turned out, and are happy to say that everyone who received them for Christmas loved them too.

As you can tell, our friends love Batman, but you can easily customize them to suit whatever comic book you (or your friends) fancy.  Another alternative might be to try using scrapbooking paper, old sheet music, etc.  The possibilities are endless!

p.s. ♥ kelsey & jordyn

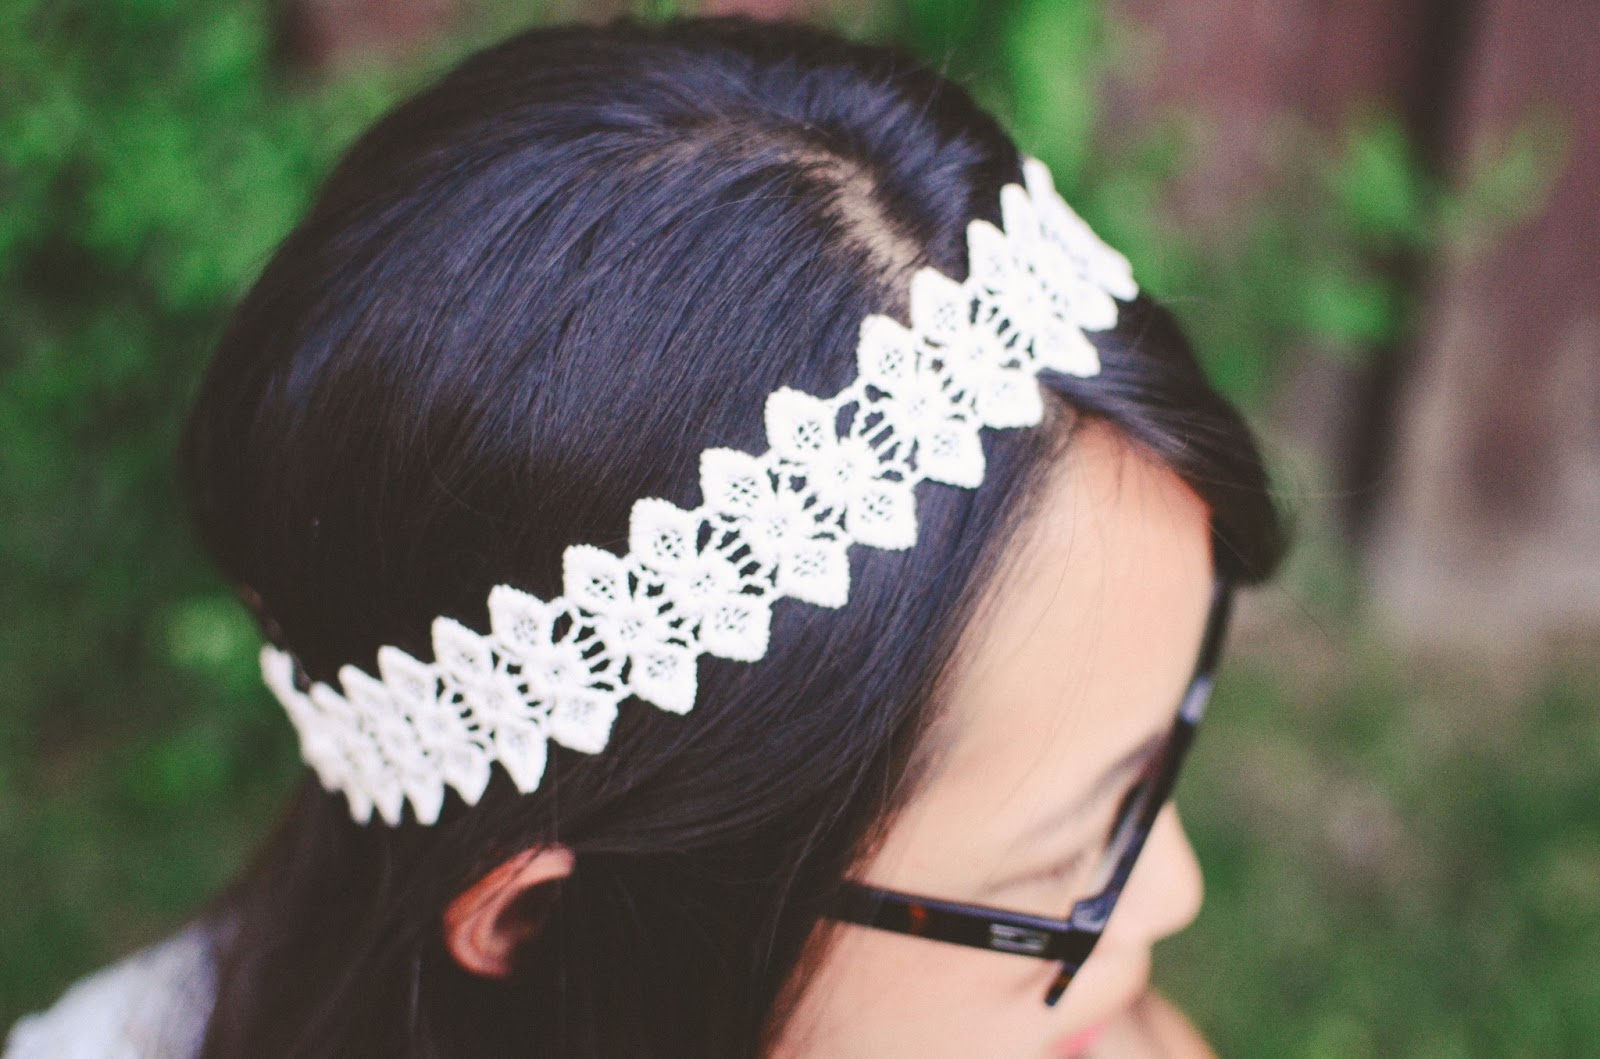
diy : simple, no-sew lace headband

0 comments
I love lace. This may be highly apparent to you, since us ladies at p.s.heart have a rather overwhelmingly large number of posts that include lace...and really, we're totally guilty of a slightly out-of-control lace obsession and we'll be the first to admit it! So there, I admit that I am a little obsessed with lace, but without this obsession, this adorable DIY wouldn't be coming your way. So really, you're welcome. Now enjoy this ridiculously simple and awesome DIY.
Supplies Needed:  lace (of course!), a couple hair elastics, and a glue gun. 
Instructions. 
1. Measure out your lace by wrapping it around your head. (I used enough lace that it would just barely touch when I wrapped it around my head!)
2. Fold your lace over your elastics and glue gun it so that your lace is firmly folded over onto itself. Repeat this for both sides of your piece of lace. 
3. Let your glue dry, make sure your lace isn't going to just rip right off, and then voila! 

You're done. 

Yep. It's really that simple.
Again, you're welcome.
Enjoy this lovely summery accessory! 

p.s.   clara

diy: tissue paper pom poms

0 comments

Here's another diy that can be used to decorate just about any party you host!  We used it for a bridal shower, and two years ago Clara used them at her wedding!  I just love how adorable and cheap these pom poms are, and you can whip up a ton in no time at all.

For the shower, we decided to hang up a few of these pom poms in the windows, as well as use some of the smaller ones at the end of our bunting to give it more of a finished look.


Materials:
-tissue paper (we bought ours at the dollar store for a dollar a pack)
-thin wire (florist wire works wonderfully....or you could use twist ties if you have them on hand)
-fishing line (if you intend to hang them)
-scissors


Directions:
1)  First you need to decide what size of pom pom you want to make.  Our tissue paper was approximately 20"x26", and we cut it in half lengthwise to make our largest pom poms (which I thought were pretty large!). For most of our pom poms we cut the tissue paper in thirds lengthwise.  We also made some mini ones by dividing it in four lengthwise.  Experimenting is the best way to decide which you like the best!  There really is no right or wrong way to do it.
2)  For larger pom poms, you want at least 8 layers of tissue paper, and for medium to small pom poms 6 layers is enough.
3)  Once your tissue paper is measured out and cut, make 1.5" accordion folds, creasing each fold as you go.
4)  When your tissue paper is all folded, cut a small piece of wire and wrap it around the middle of your folded tissue.
5)  Then, trim the edges of the folded tissue.  We chose to make the edges rounded, although you can do whatever you'd like!  Experiment with different shapes and angles to suit your style.
6)  Finally, very carefully separate each layer of tissue.  Go slow, and be patient!  You may rip a few layers, and that's fine.  Once all the layers are puffed out, you will likely not notice.  Or you can use scissors to trim away any errors.
7)  If you want to hang our pom poms, then tie a piece of fishing line around the wire wrapped around the center of the pom pom.


p.s.   kelsey

diy: TARDIS shoes

0 comments

Now, in case you haven't figured out that I'm a giant nerd yet, here's some more proof.

To my fellow Whovians, please enjoy this tutorial!  And to all of you who are extremely confused, and have no clue what a "TARDIS" is, please go watch Doctor Who asap...you will not be disappointed!


I could go on and on about how epic the show is, how it doesn't take itself too seriously, how it celebrates humanity and friendship and ordinary people, and how bowties are cool....but I'll spare you my ramblings and get on with the tutorial.

For those of you who still have no idea what I'm talking about, then you can use this as inspiration for making your own painted shoes with whatever suits your fancy on them!  The possibilities truly are endless.


Materials:
-shoes (in our case....tardis blue ones)
-black and white acrylic paint (or fabric paint)
-masking tape
-black fabric sharpie (these things are heavenly)
-white paint pen (mine had a .7mm tip)

Directions:
1) First, take out the laces and stuff newspaper inside your shoes.  The newspaper is there to help the shoe keep it's shape as you paint/write.
2)  Then, use masking tape to cover the side of the soles.  This will keep you from getting paint on them! 
3)  Use masking tape to mark where your windows will go, as well as where the black strip at the top will be painted.
4)  We used a black fabric sharpie to outline the windows, as well as the black box at the top.
5)  Then, paint the black strip at the top, and let it dry.
6)  Remove the masking tape where the windows will go, and paint white inside your black outline.
7)  Once the white paint has dried, use masking tape (or freehand) the lines on the windows with a black fabric sharpie.
8)  Then, you may use masking tape to mark where the top of the tardis will go, or freehand it with your black fabric sharpie.
9)  For the writing of "Police public call box", I first wrote it in pencil, and then went over it using a white paint pen.  (You could also attempt this with a skinny paint brush, but it will be harder to do!).
10)  Let everything dry, apply second coats if needed, and touch up any mistakes.
11)  Put your laces back in, and wait for the doctor to arrive!


Jordyn and I had our friend Ashley (who is the Queen of painting shoes) over to help us with this diy, and we had a blast!  We did a ton of brainstorming for more summer diys, and can't wait to share them with you all!


"The good things don't always soften the bad things, but vice-versa, the bad things don't necessarily spoil the good things and make them unimportant."
-The Doctor


p.s.   kelsey


diy : washi tape bunting

0 comments
This is a super simple, super cute, washi tape DIY that makes me love this tape even more! Seriously, there are sooooo many cute things one can do with washi tape. & since I'm seriously in love with floral patterns, jute, and bunting in general, I had to make this simple DIY to share.


All you need for this simple DIY is some cute washi tape, jute, and scissors.
{ i n s t r u c t i o n s } 

1. cut some strips of washi tape
2. cut a piece of jute for however long you want your bunting to be

3. take the peel off the washi tape, and fold it onto itself on the piece of jute
4. take your scissors and cut out little slips to give your washi tape a "banner" type of look!


p.s.   clara 


diy: birdcage necklace

0 comments


I'm not sure if this really counts as a diy...haha.  It kind of feels like I'm cheating!  I suppose I'm just drawn to simple projects, especially when making my own jewellery.  It doesn't have to be super complicated or expensive, and it feels nice to put stuff together yourself.


I found this darling birdcage pendant on sale at Michaels, and I just couldn't pass it up.  If you haven't noticed, I go to Michaels a lot.  Definitely a bit obsessed!  Their prices are a bit ridiculous, but if you have a coupon, or can spot a good sale, then you're good to go!


Materials:
-pendant
-chain
-jump ring
-pliers (or just very strong fingers!)


Directions:
First loop your jump ring through your pendant, and hold.  Then find the exact middle of your chain, and loop that chain through the jump ring as well.  Finally, use pliers (or strong fingers!) to close the jump ring.  Voila!  That's all!

Now I always make sure that my pendant, chain and jump rings all match since I'm a bit ocd.  There are so many variations of golds, coppers, and silvers that it can be a bit tricky!  I've found that sticking with the same brand makes matching much easier!  

Also, you may want to buy a longer length of chain, and then have the option to cut it into lengths.  You'll then need to purchase clasps as well, but those are super easy to attach to your chain...so experiment with whatever works best for you!


I love that this piece of jewellery is nearly one of a kind, and it always feels nice to work with your hands a bit!


And thanks goes to my gorgeous roomie for putting up with all my crazy blog stuff...and for modelling the necklace!  I am so blessed to have such patient and supportive friends!


p.s. ♥ kelsey

diy: dahlia earrings

0 comments

It's been a while since I've posted a jewellery diy, and I'm in love with this one!  Although it may be classified as cheating since it's basically the same as my rose earring diy I posted nearly a year ago.  Oh well!  I hope you still enjoy it!


Materials:
-dahlia cabochons
-E-6000
-earring posts and backs
-Q-tip

Directions:
First dab a bit of glue onto one of your dahlias. Then press an earring post firmly onto the back of the rose. You should apply enough glue that little bit squeezes out when you apply the earring post. Then, use a Q-tip to clean up any excess glue.  Let them dry completely (24 hrs) before wearing!


I found these cabochons on etsy, and they were nice and cheap!  Have I mentioned before how much I love etsy?  It's such a wonderful place.


I really love how simple these are to make, and how adorable the end result is.  Just like the rose earrings, they make really wonderful, handmade (and cheap...hehe) gifts!


p.s. ♥ kelsey