
Today I'd like to present you with...camouflage cupcakes!!
These babies are definitely out of the norm for Jordyn and I, but Jordyn had her heart set on making camo cupcakes for one of her best friends' birthdays. Let's just say I was pretty skeptical about the whole situation, especially the icing part....since there was no way that I was going to fuss too much with a million bags and colours. Lucky for us, these were waaaay easier than expected, and turned out adorably!


Now this is a bit more of a tutorial than an actual recipe, so feel free to mix up your cake recipes...and don't be ashamed to use box mixes! We actually used a box mix for the white cake, since we love how fluffy and wonderful the cake is....and it helped speed up the whole process!
For chocolate cake, you could use our favorite chocolate cake recipe, or even our heavenly mocha cake recipe! And for white, you could go with our nice and simple vanilla cake recipe.
Directions:
1) First you'll need to get both the chocolate and white cake batters ready to go.
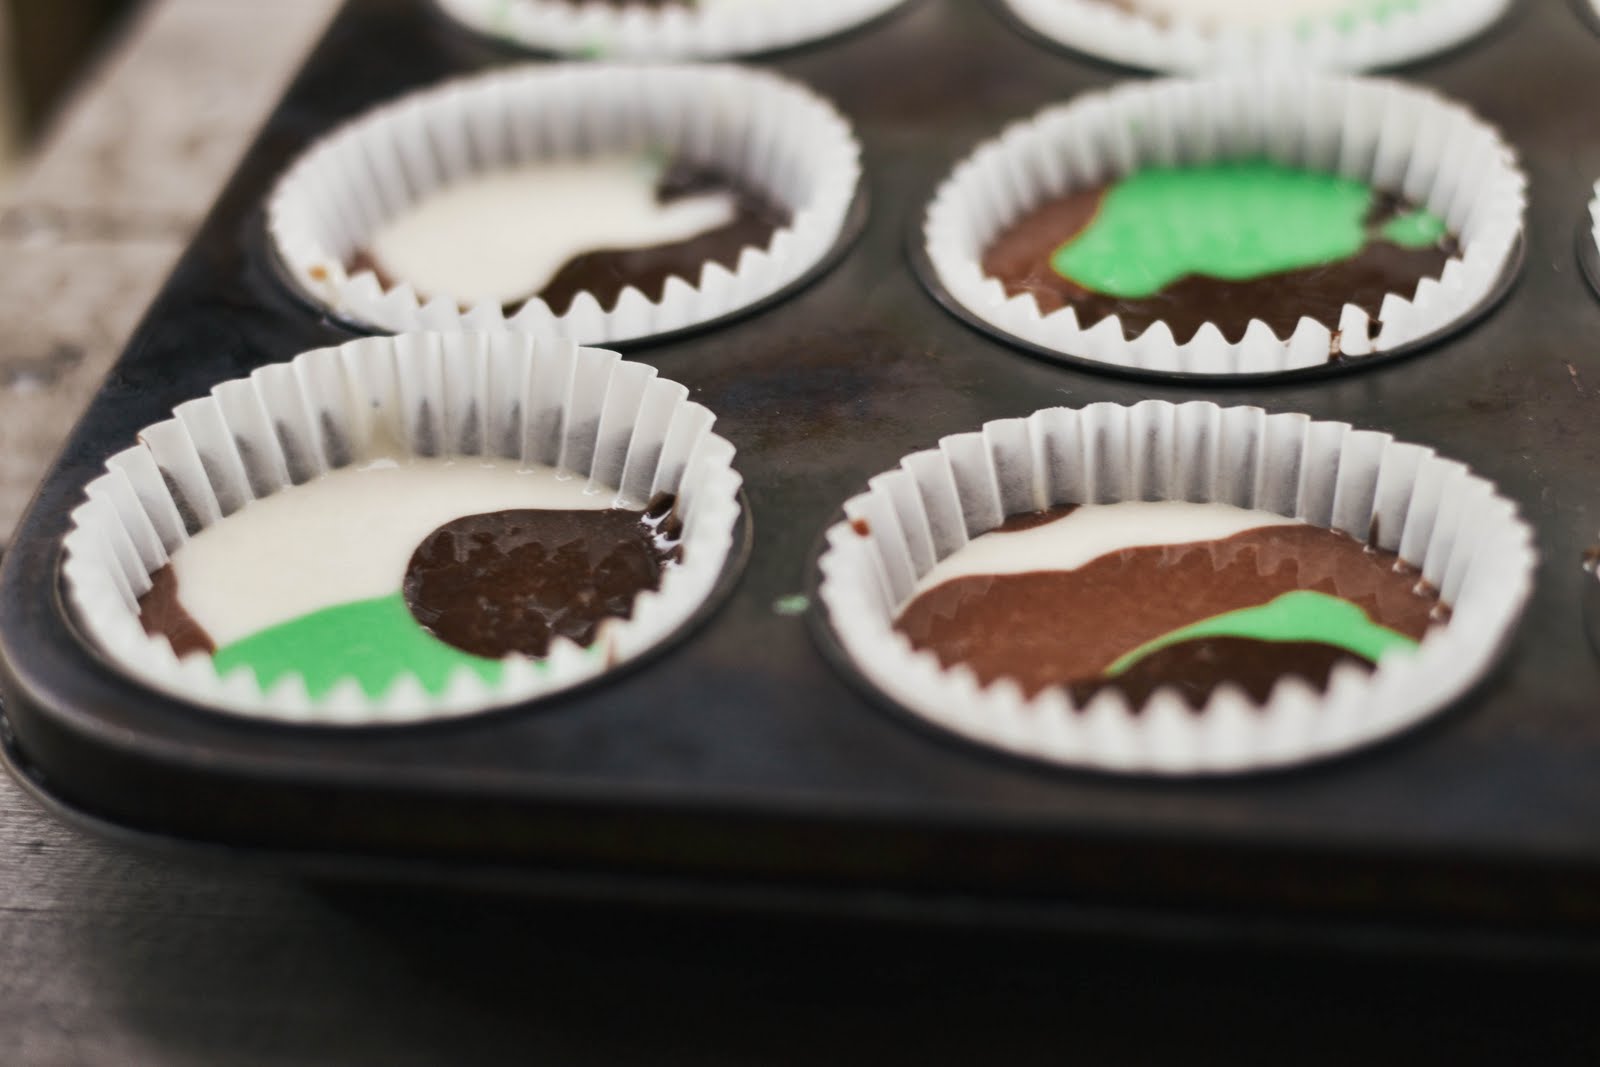
2) Then, separate the chocolate into two bowls, and the white into two bowls.
3) Leave one of the chocolate bowls alone, this will become the darkest brown.
4) Add a few tablespoons of white batter to the other chocolate batter, until it is a slightly lighter shade of brown.
5) Leave one of the bowls of white batter alone, and colour the other one green.
*Now these are all just guides of course! Feel free to do different shades of green if you'd rather, no brown, or no white....just go nuts!
6) Line cupcake tins with cupcake wrappers (or grease them if you're not using wrappers).
7) This is the fun part! Using squeezy bottles is probably the easiest and cleanest way to pour some of each colour of batter into the cupcake tins, but we found that measuring cups or spoons worked just fine. The point is to add a bit of each of your four colours into the tin, creating a camo pattern. We often poured two colours at once about halfway up the cupcake tin, and then adde a bit of the other two colours. Once you've done a couple you'll definitely get the hang of it!
8) Bake cupcakes according to instructions and let cool.


Icing:
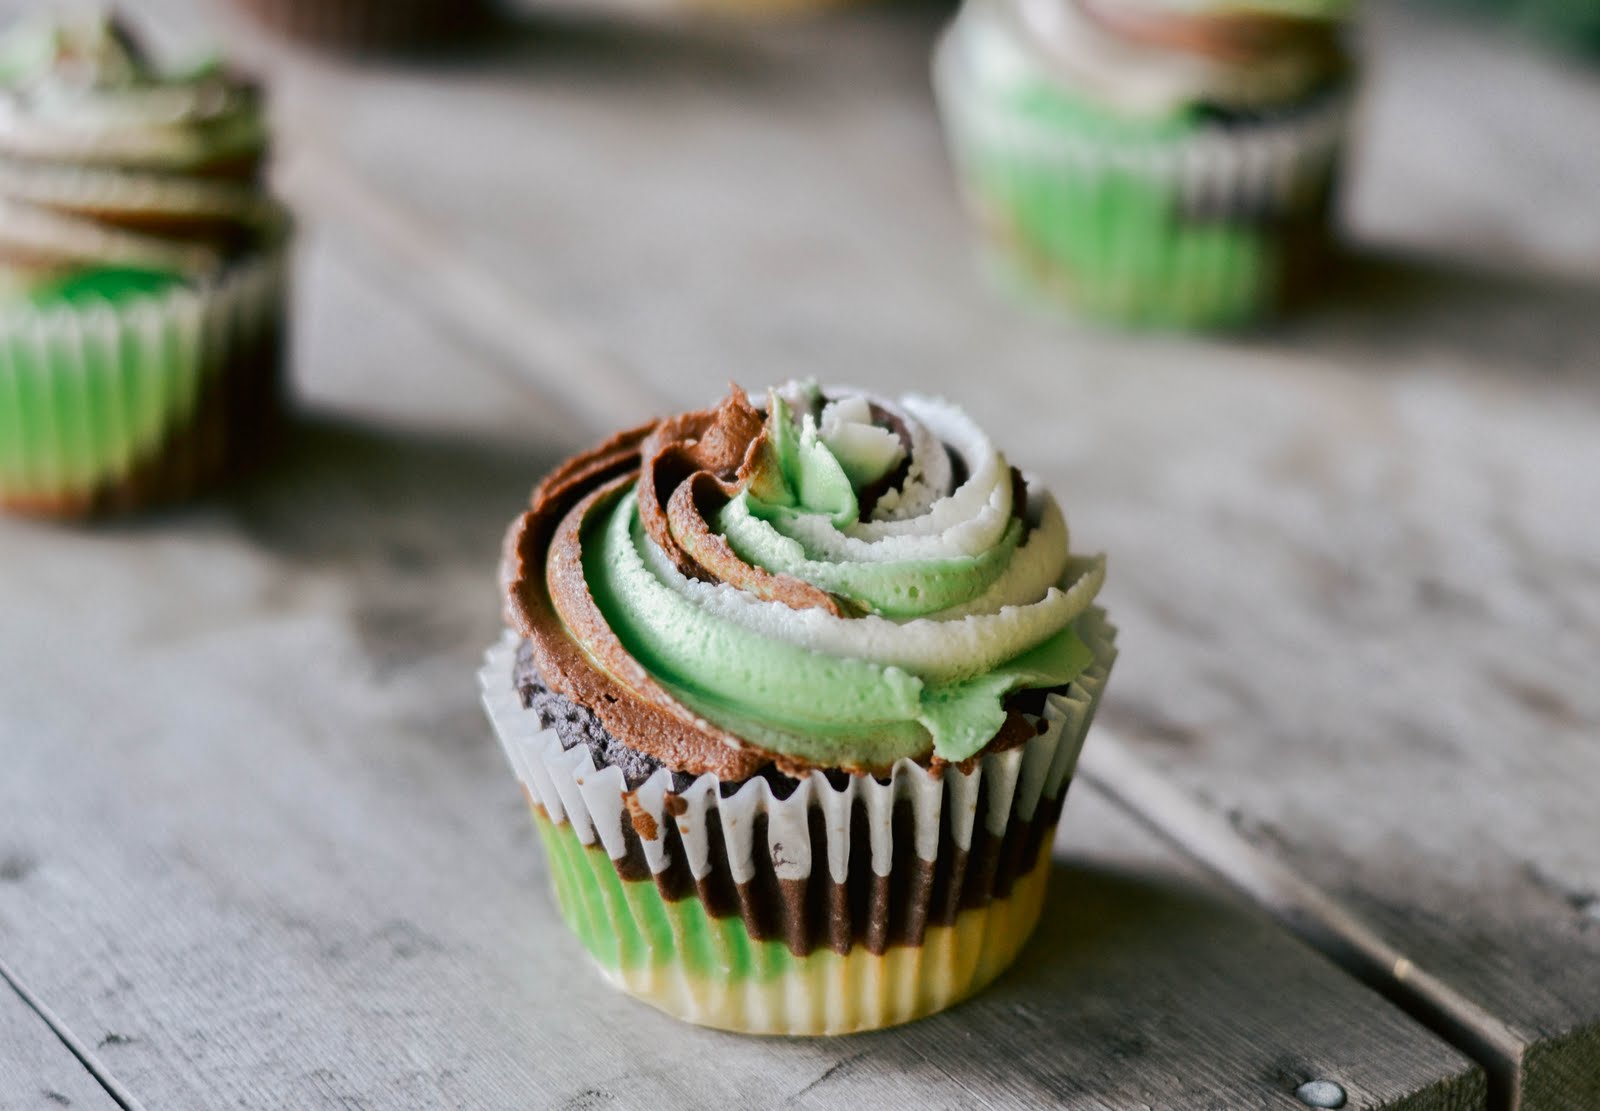
For the icing, we made our basic butter cream recipe and doubled it. Then we coloured some green, some brown (with a bit of cocoa powder), and left some white. Then, I used a spatula to smear/place some of each colour down the inside of a giant icing bag. It's hard to get the three colours distinct right at the bottom, so I piped some practice cupcakes until all three colours were coming out of the bag in a nice pattern.
If you're not up for the hassle of that, I think that plain white, chocolate or green would also look great...especially if sprinkles were involved!


Serve to your friends, and watch as they take their first bite, and are amazed at your talents! hehe.


Jordyn just made a variation of this using just white cake batter, and coloured it all the colours of the rainbow for her dino-themed birthday we threw this past weekend. They turned out amazingly, and just goes to show how versatile this technique can be!
I personally think that these would be adorable as pink and white or blue and white swirls for baby showers, or even pastel swirls for bridal showers! The possibilities are endless.
p.s. ♥ kelsey
0 comments:
Post a Comment